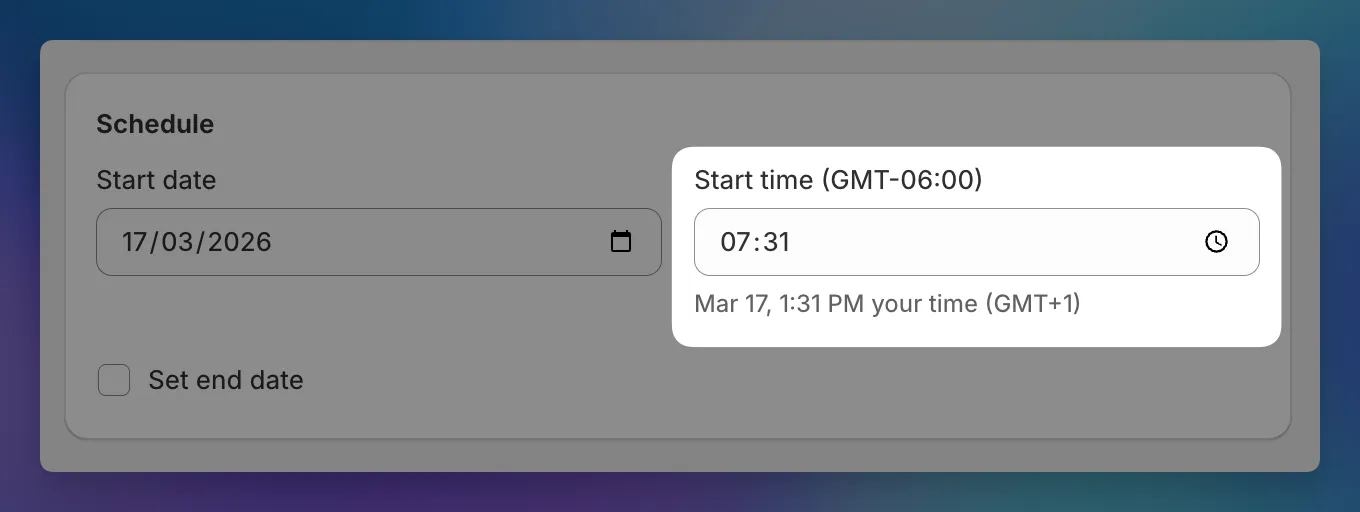
Sale scheduling uses your store’s timezone, which gets confusing if you’re in a different one.
You’ll now see a hint below each time field showing your local equivalent. If your store is in New York but you’re in London, you’ll see something like “Oct 15, 3:00 PM your time (UTC+1)” next to each scheduled time.
The hint updates as you change the date or time, and hides when your timezone matches the store’s.
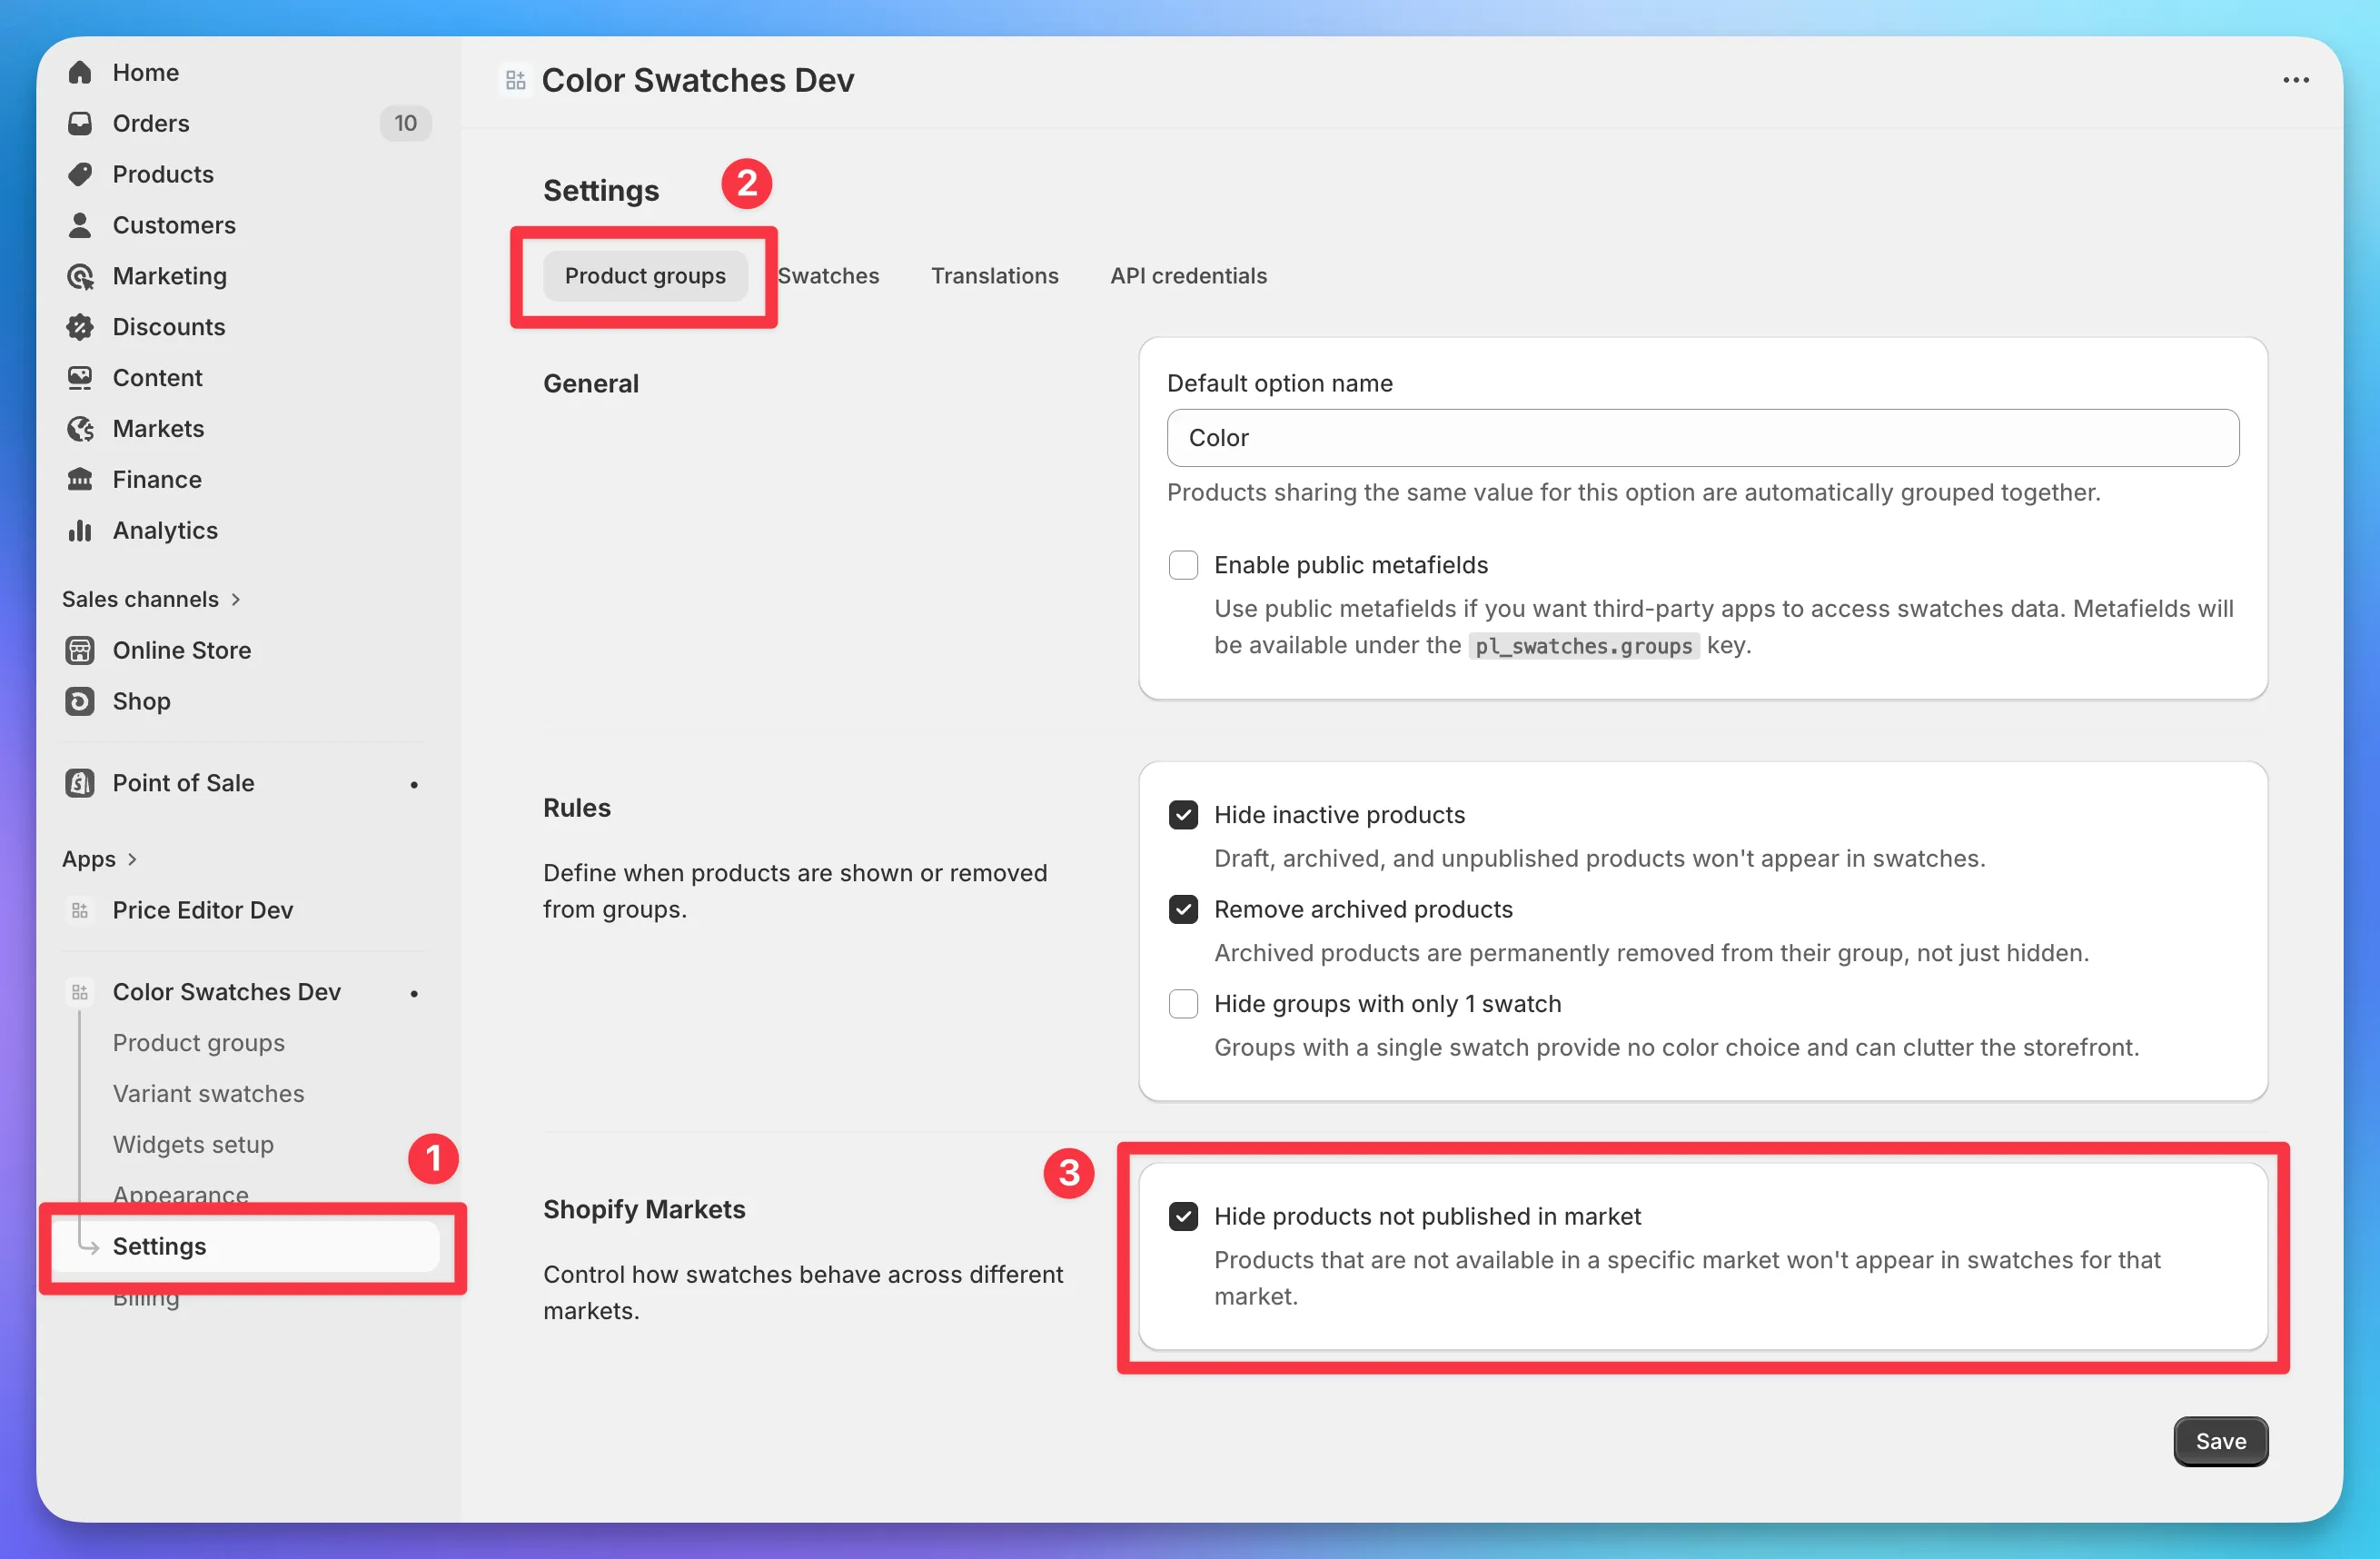
Platmart Color Swatches app can now check if a product is published in a specific Shopify market and hide it’s swatches if it isn’t. Very useful for multi-market stores.
The app checks market publishing status daily and updates metafields automatically when changes are detected. No manual syncing needed.
Setup
Go to Settings > Product groups and find the Shopify Markets section. Check Hide products not published in market and save. This feature is available on the Advanced plan and above.
Previously, if you wanted to rename a swatch or update its color, you had to change it in every product group separately. If you manage a large catalog with dozens of groups, that added up fast.
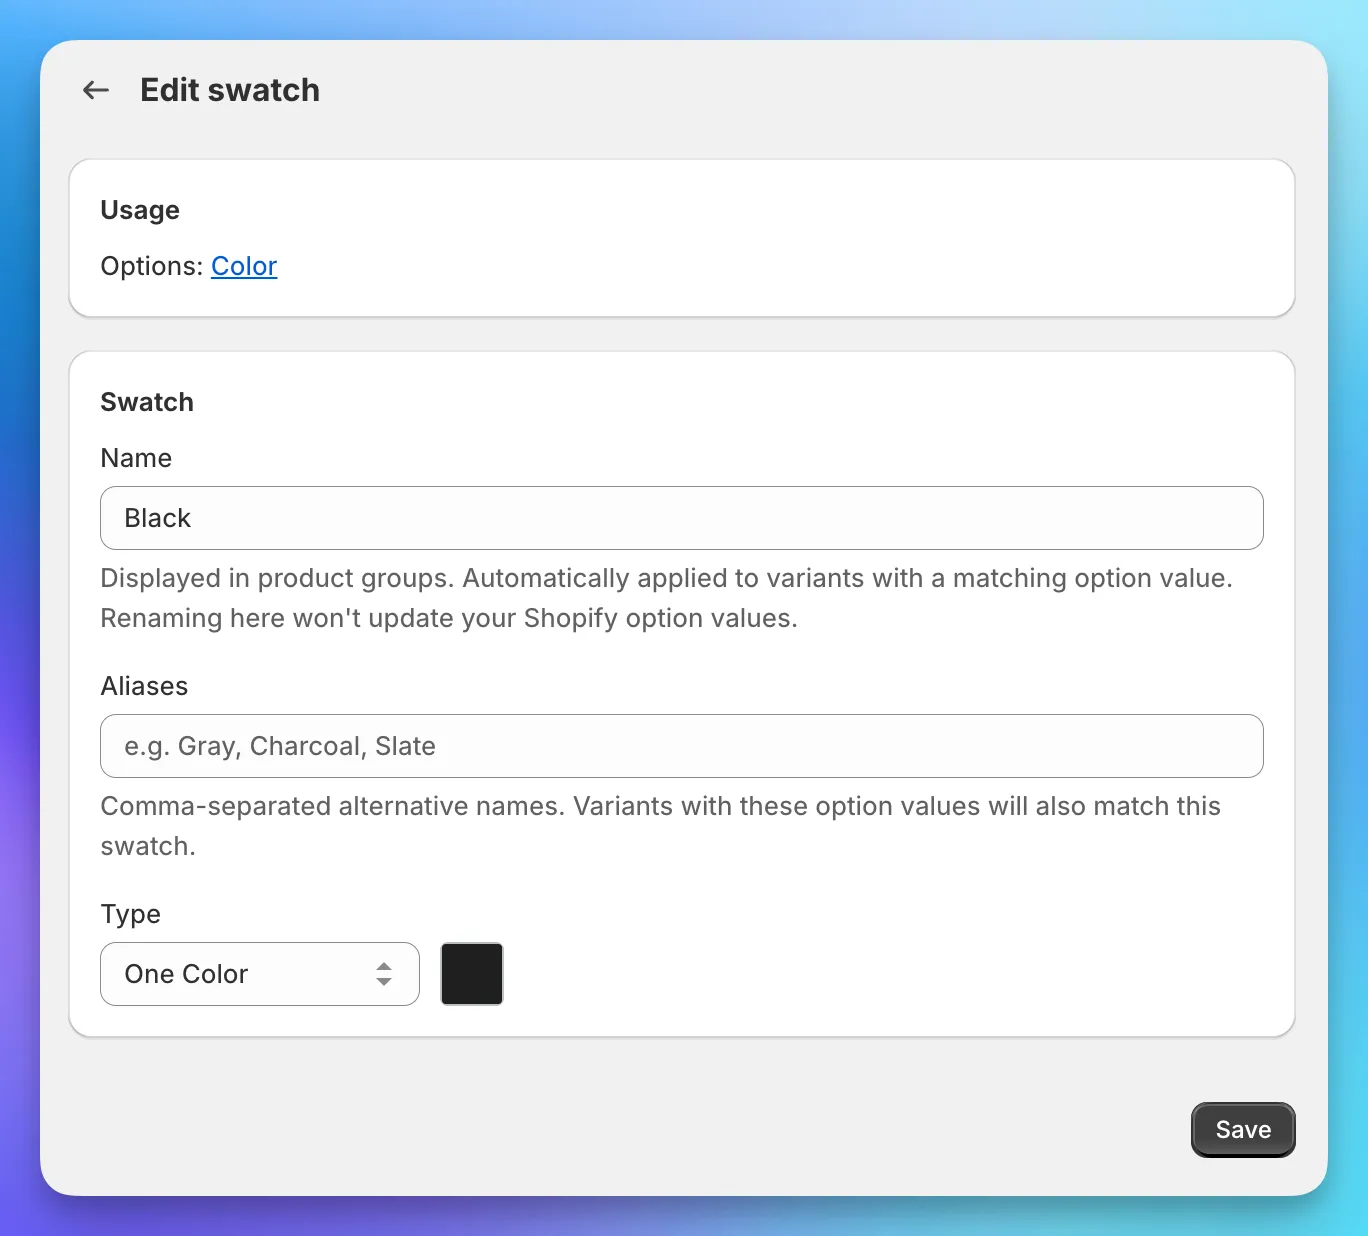
You can now edit a swatch once and the change applies everywhere - across all product groups and variant swatches automatically. This includes swatches you’ve already created, not just new ones.
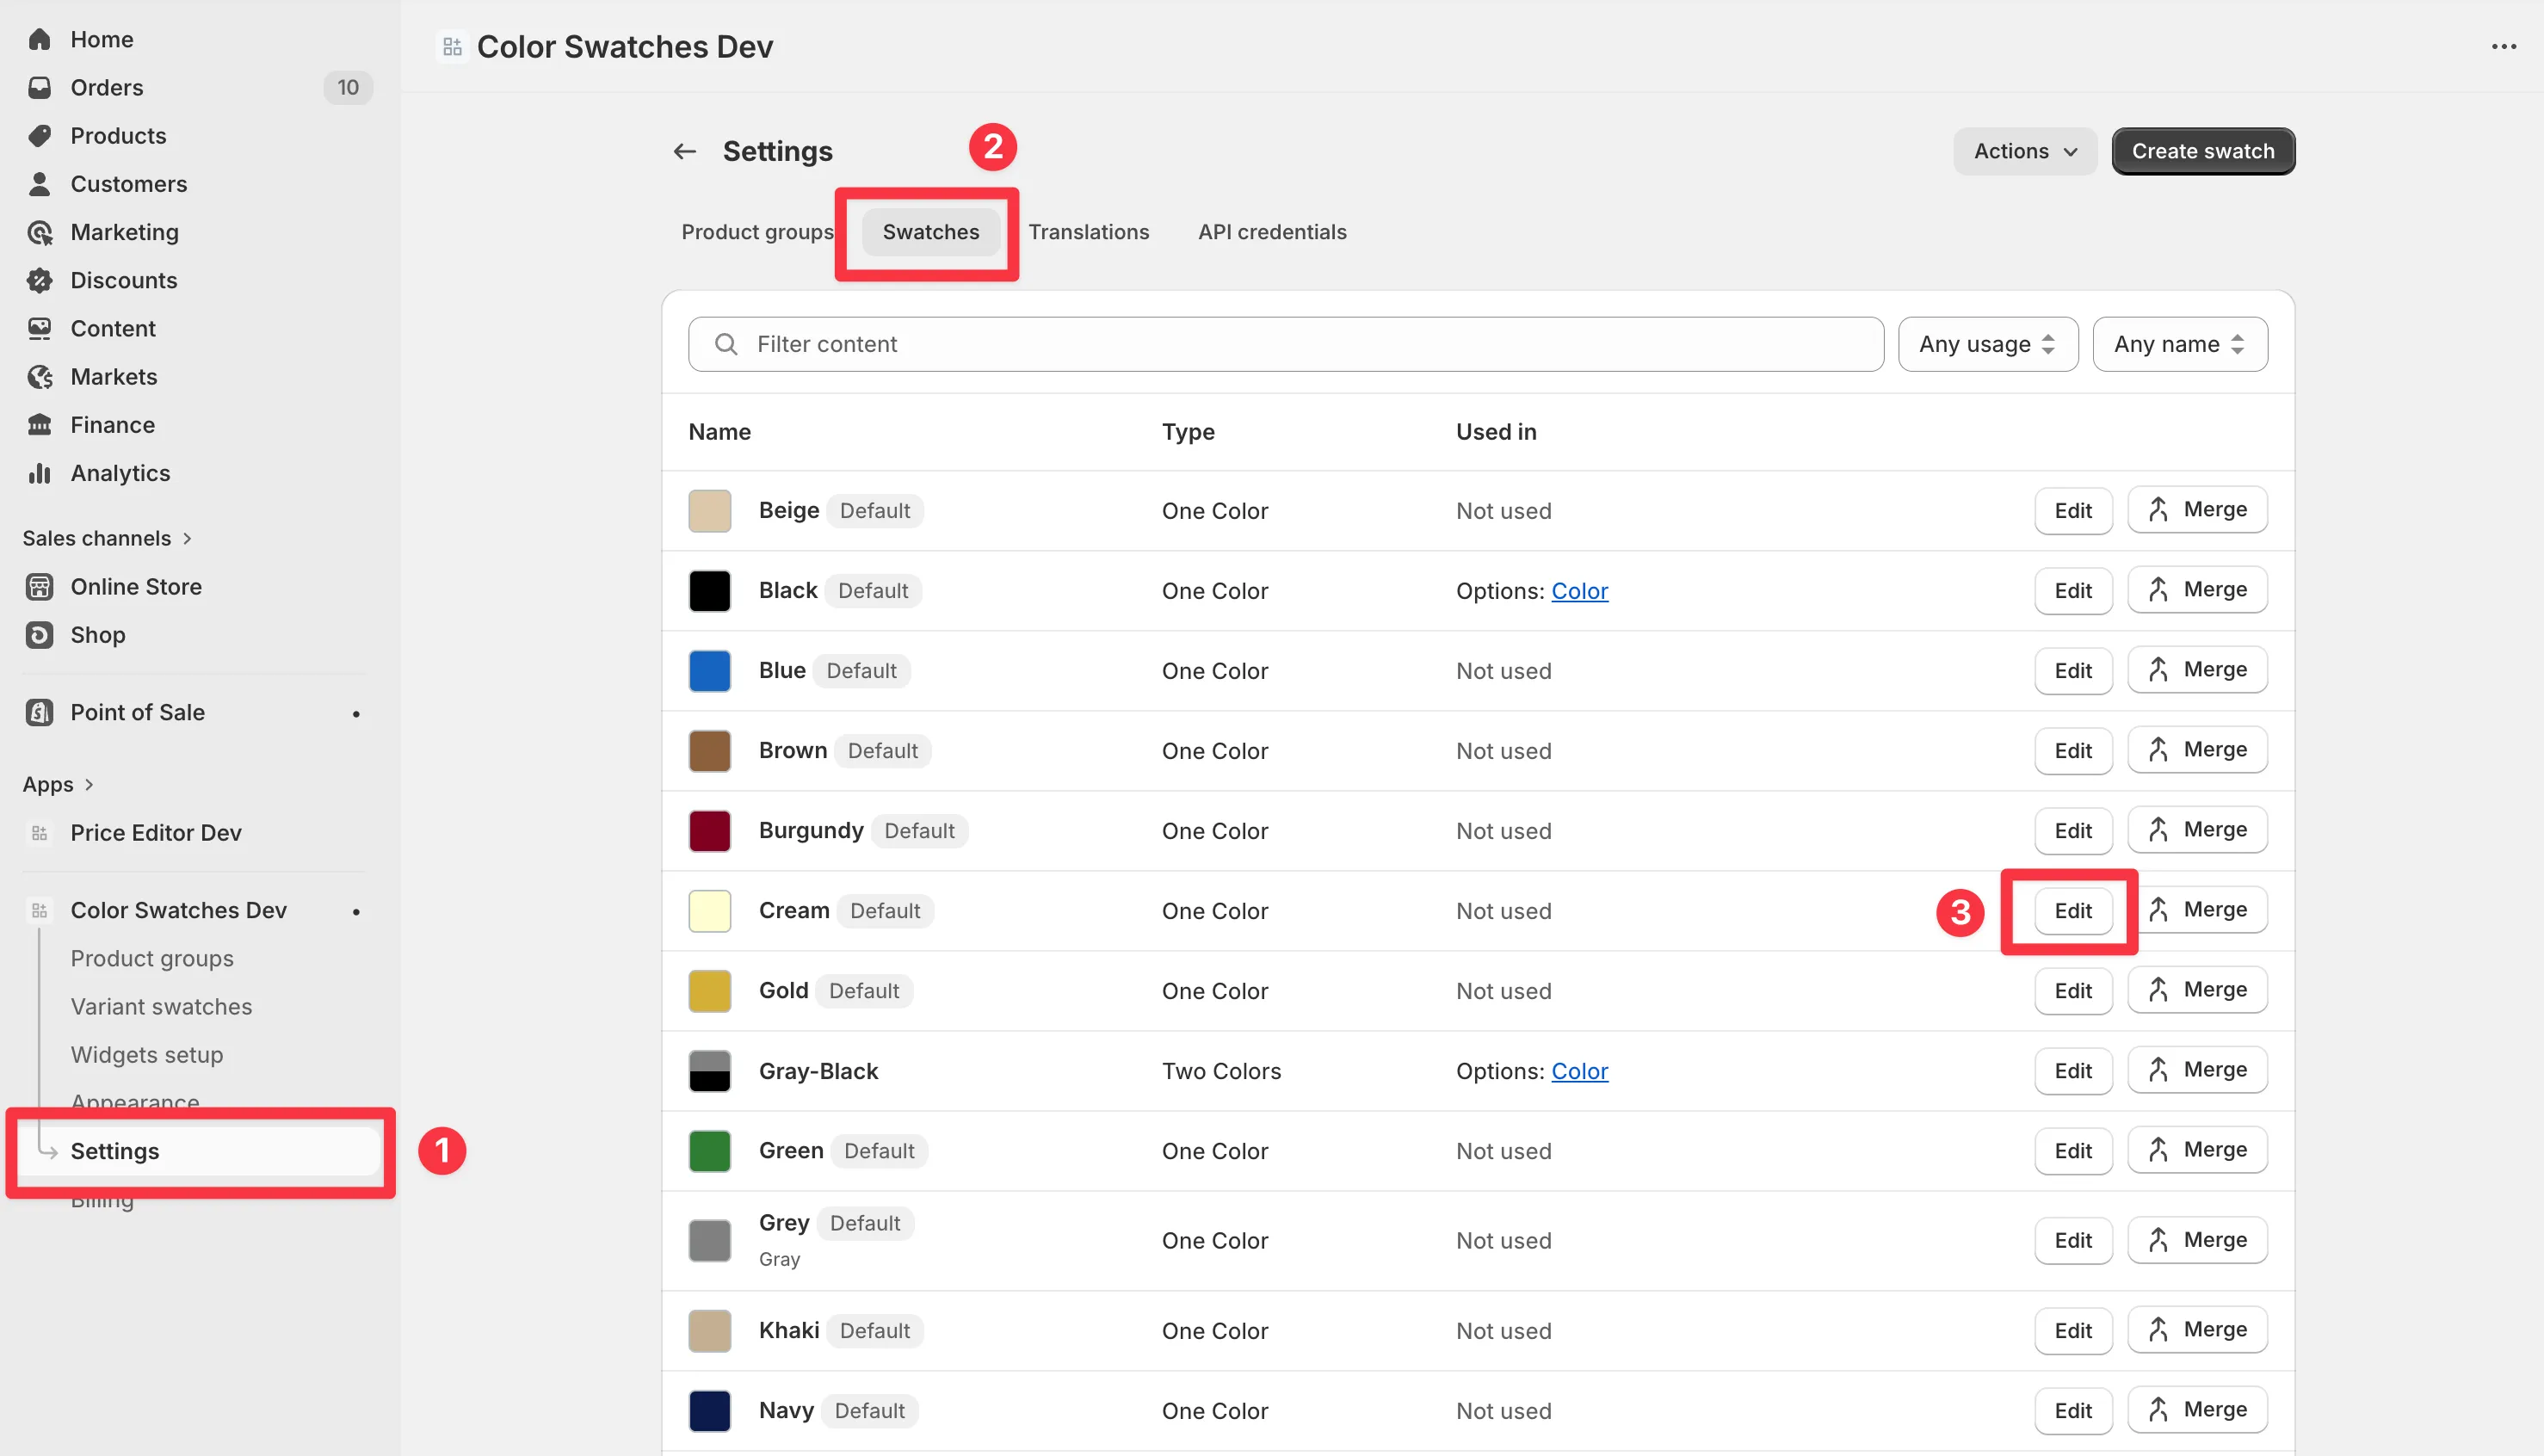
To edit a swatch, go to Settings > Swatches and click on the one you want to change. You can update the name, type, color, or image from there.
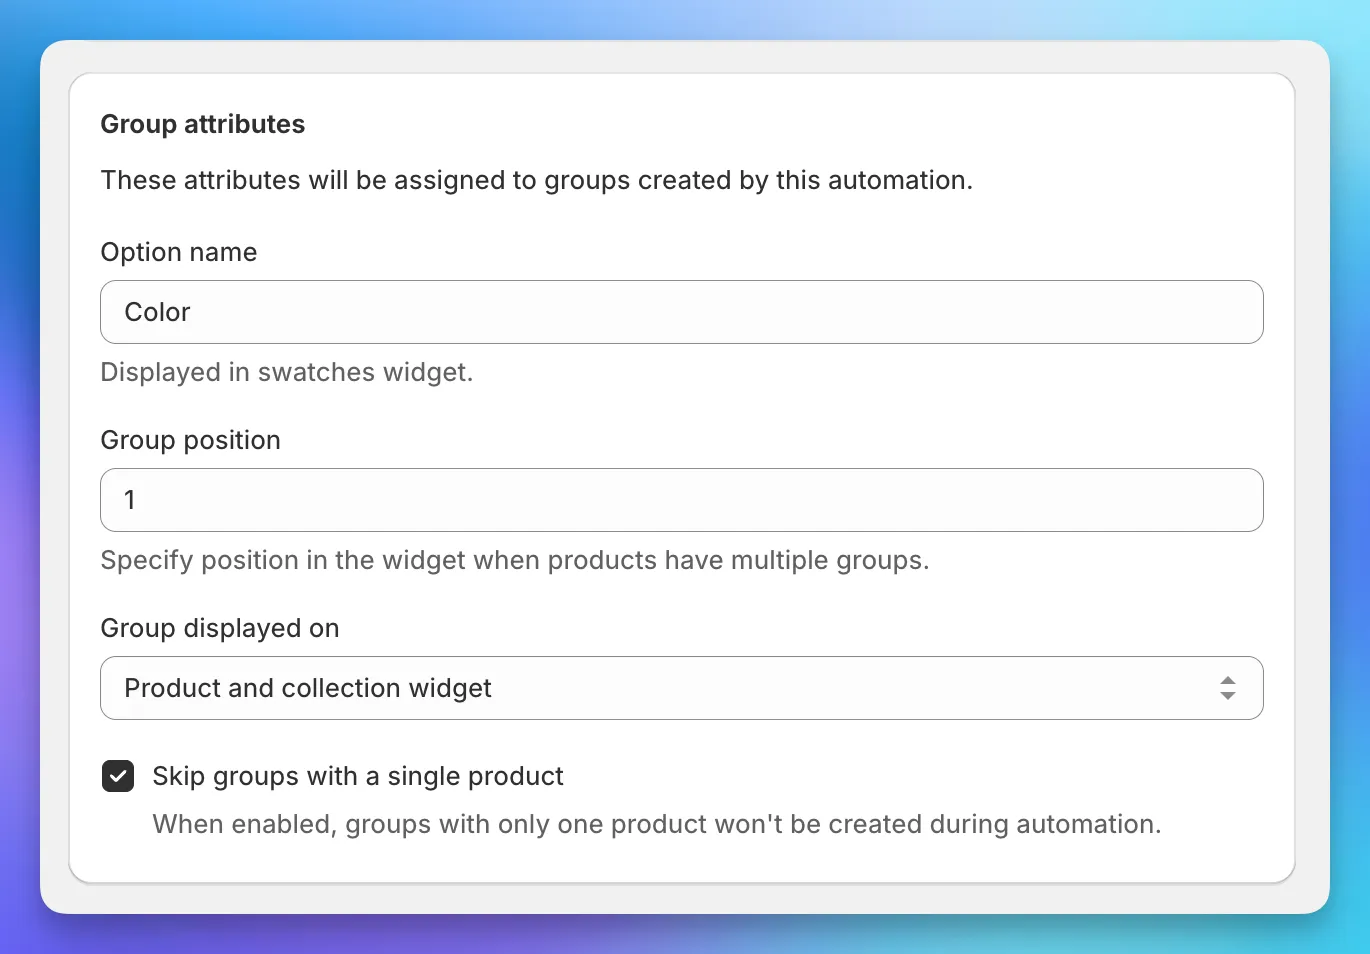
You can now tell automations to skip creating groups that contain only one product. If there’s nothing to switch between, the group just adds clutter.
This also cleans up existing groups. If a group that was previously created has only one product, it will be removed automatically.
To activate this feature, open the automation you want to configure and check Skip groups with a single product. That’s it - the setting applies on the next automation run.
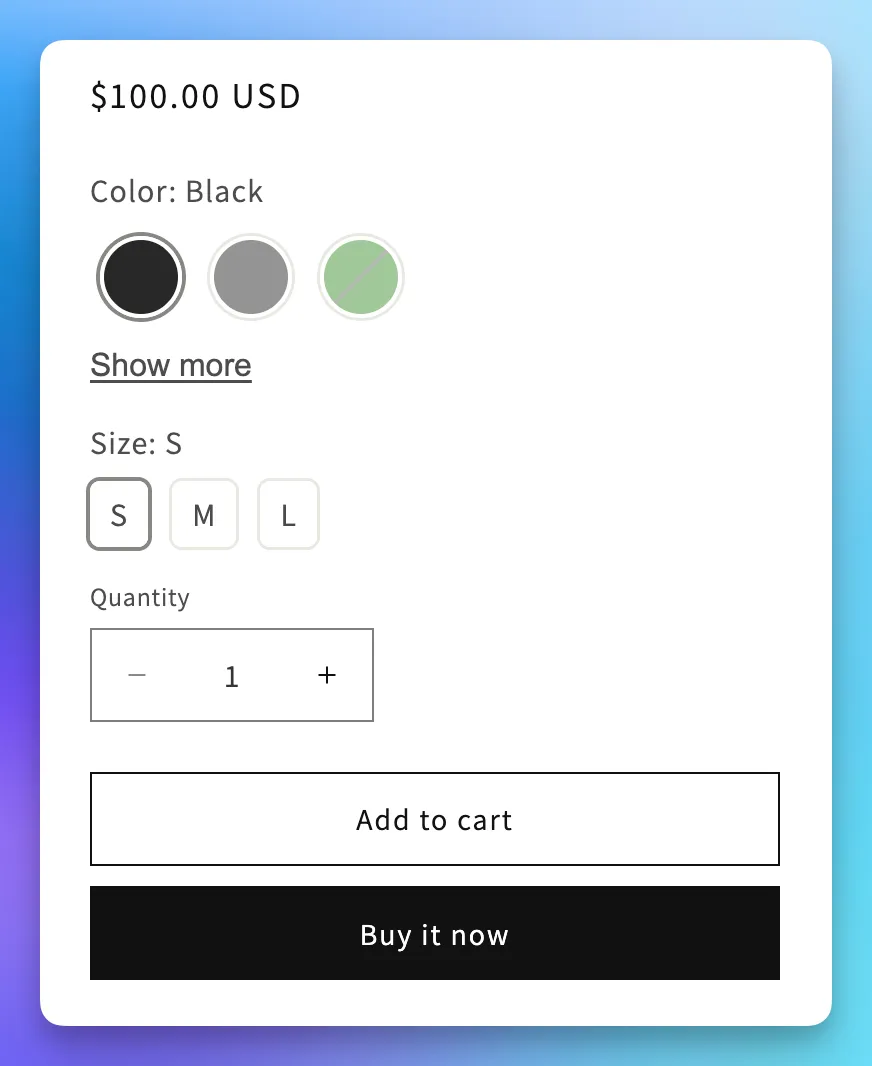
Platmart Color Swatches now lets you limit how many swatches are visible on product pages. You can set separate limits for desktop and mobile, so customers on smaller screens see a tidier layout without losing access to the full list. A “Show more” button lets them expand when needed.
This is handy for products with lots of color or style options where the swatch row gets too long - especially on mobile where screen space is limited.
Setup
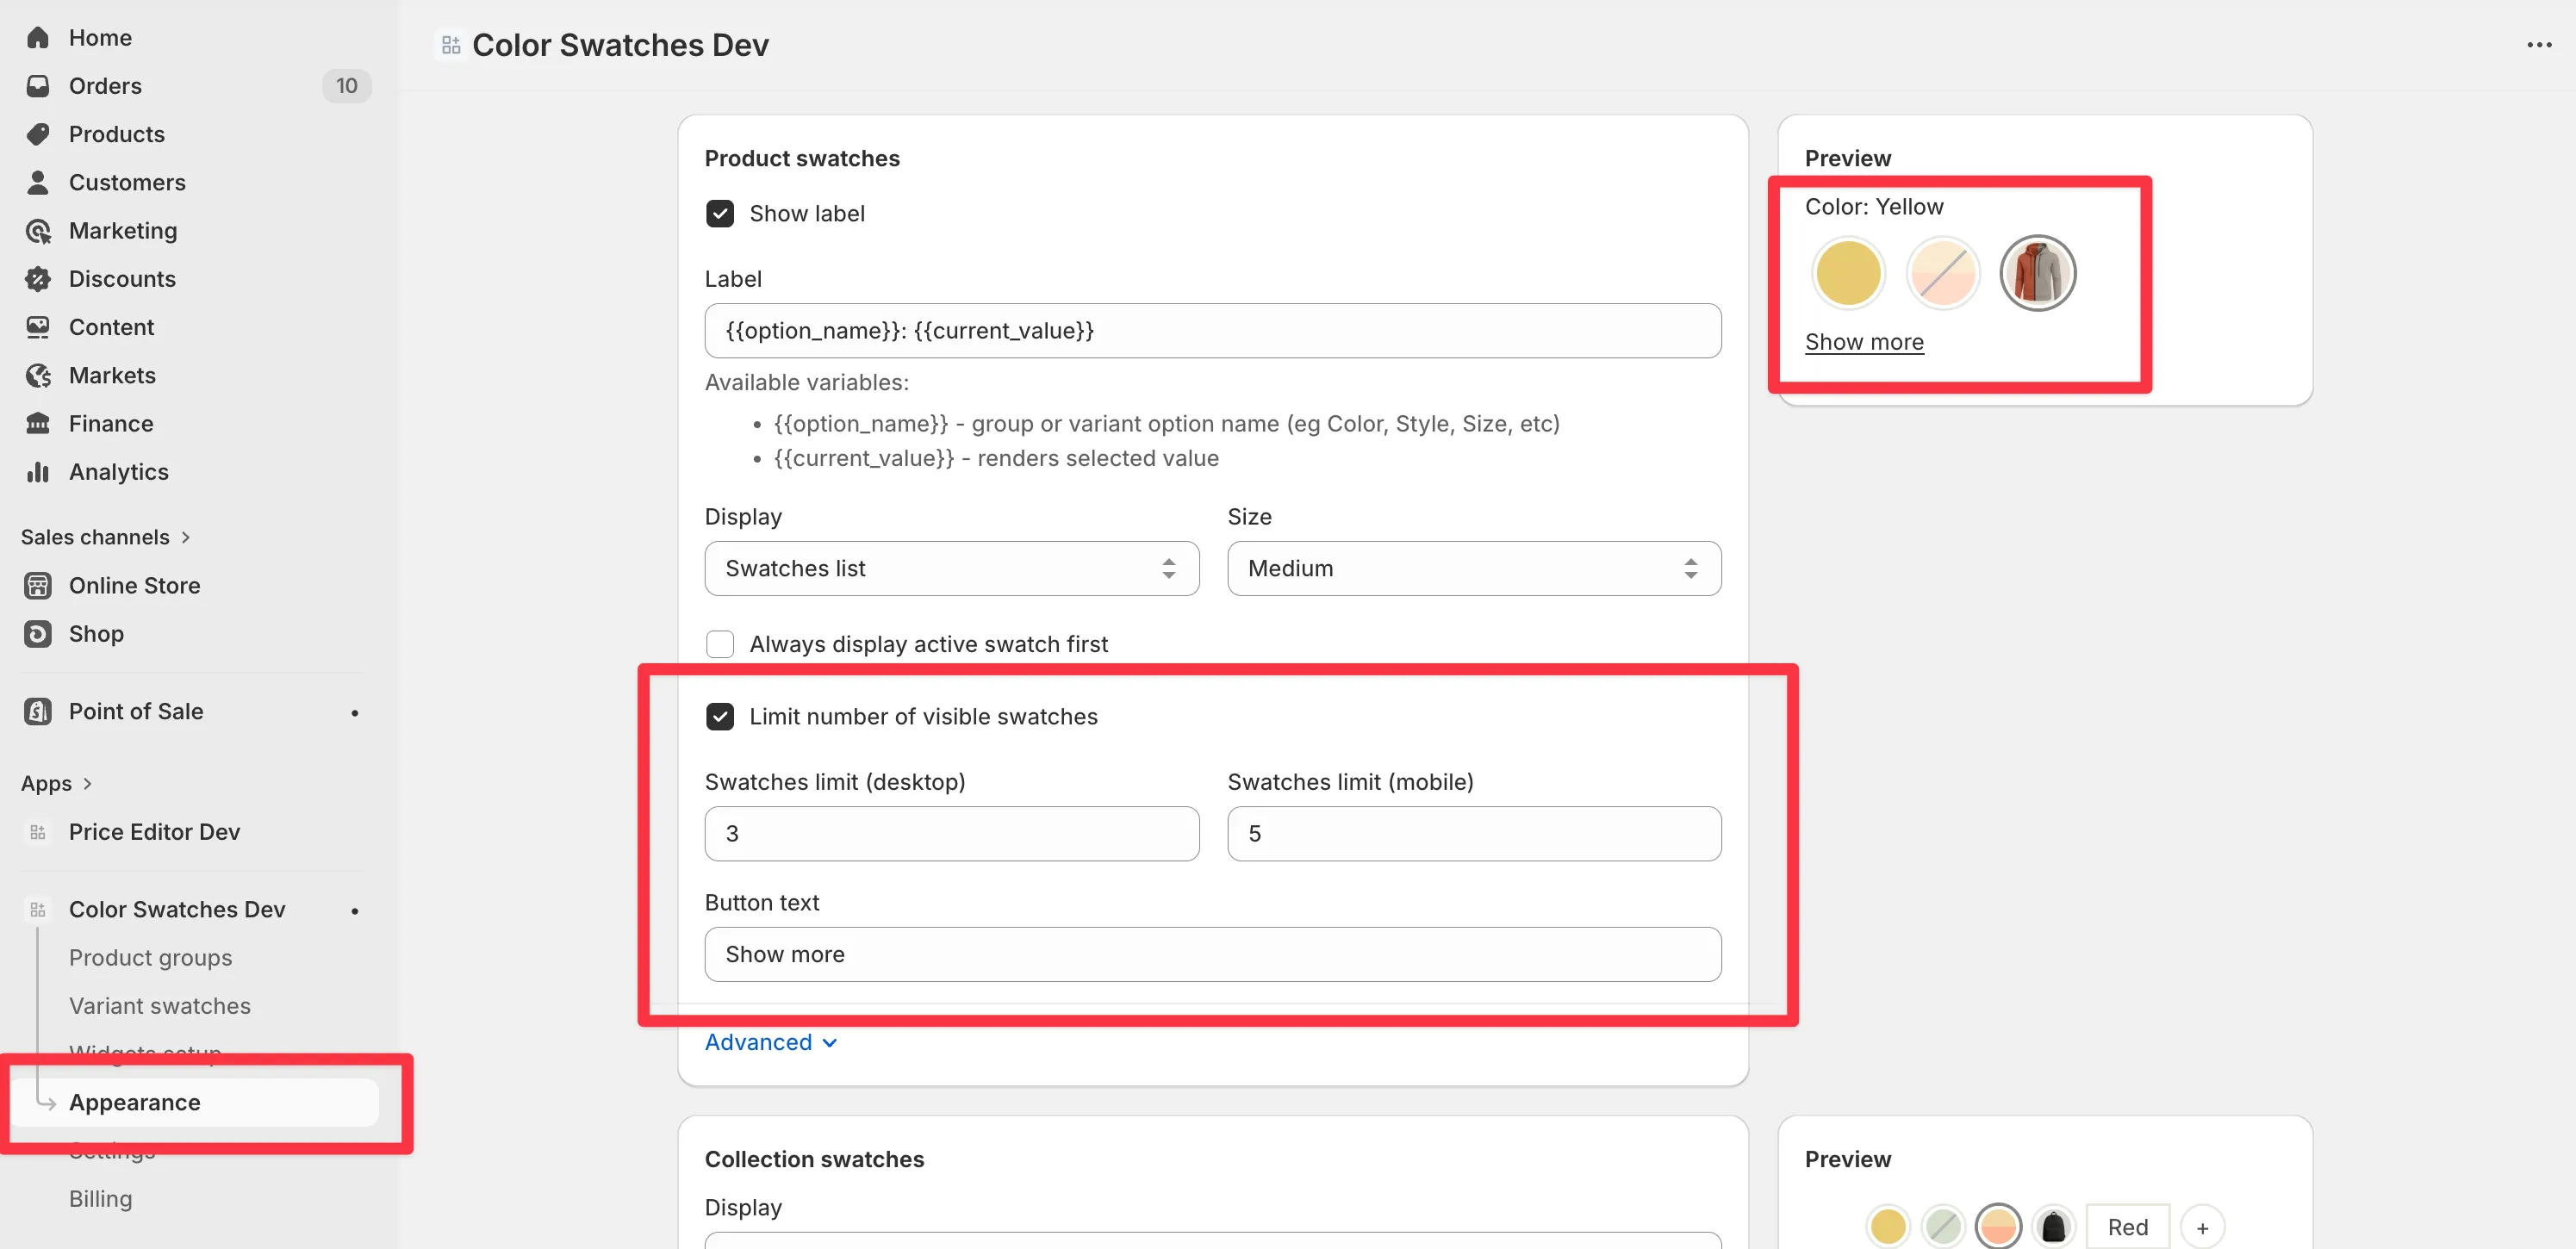
Head to Appearance tab, product display section. There are four settings:
Limit number of visible swatches - enable the limit
Swatches limit (desktop) - how many to show on desktop before cutting off
Swatches limit (mobile) - how many to show on mobile (screens under 768px)
Button text - the label for the expand button (defaults to “Show more”)
Note: this setting doesn’t apply when product display is set to Slider, since sliders handle overflow with scrolling already.
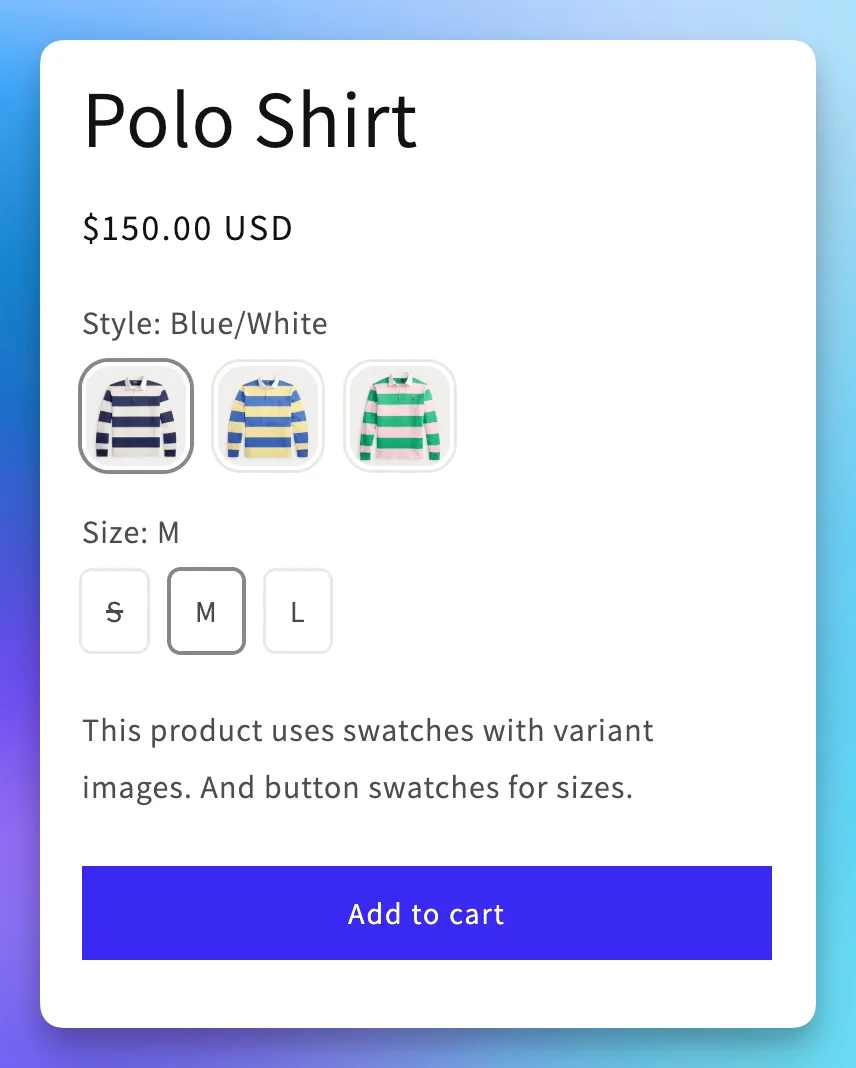
Platmart Color Swatches has always been about linking separate products together with swatches. But many merchants also wanted visual swatches for variant options within a single product to replace their theme default dropdowns.
Variant swatches do exactly that. Pick a swatch style for each option (Color, Size, Style, etc.) and the app replaces the theme’s native selector with visual swatches. Three styles are available: button for text labels like sizes, color/image for swatches with a color dot or custom image, and variant image to show each variant’s product photo as the swatch.
Setup
Variant swatches work alongside product group swatches. Use groups to link separate product listings together, and variant swatches to style the options within each product.
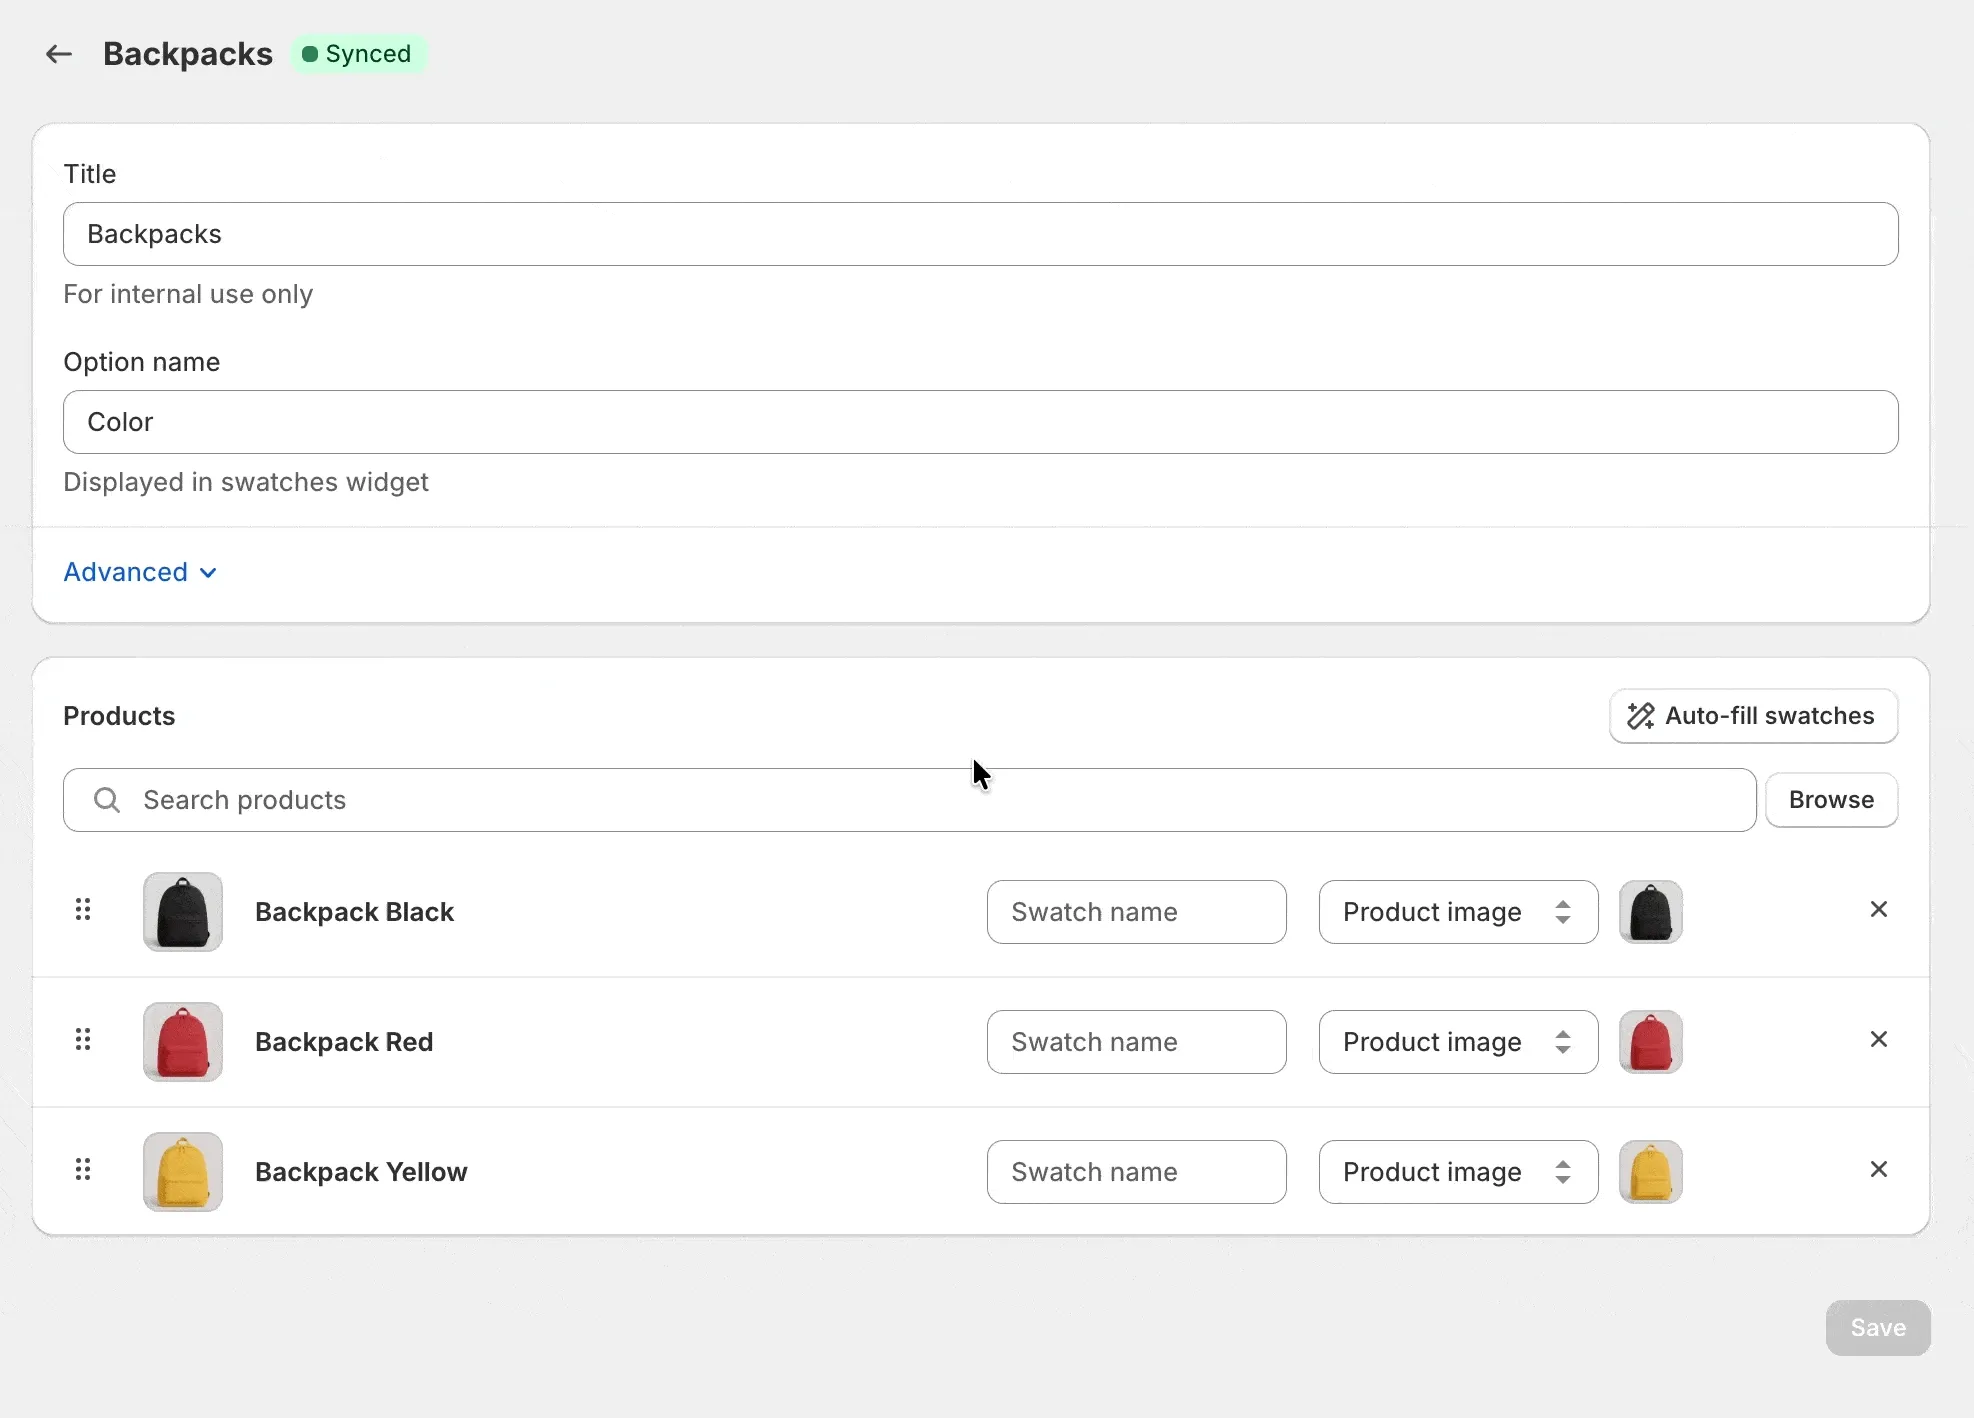
Setting up swatches for a group used to mean typing each swatch name by hand. If your product titles already contain the color or variant name - like “Classic Shirt - Blue”, “Classic Shirt - Red” - that’s redundant work.
The new Auto-fill swatches button detects the common parts of your product titles and extracts the unique portion as the swatch name. It then matches those names against your existing swatches, so colors and images get assigned automatically.
The button appears in the Products section of the group form when your titles are auto-fillable. It only fills empty fields, so it won’t overwrite anything you’ve already set up manually.
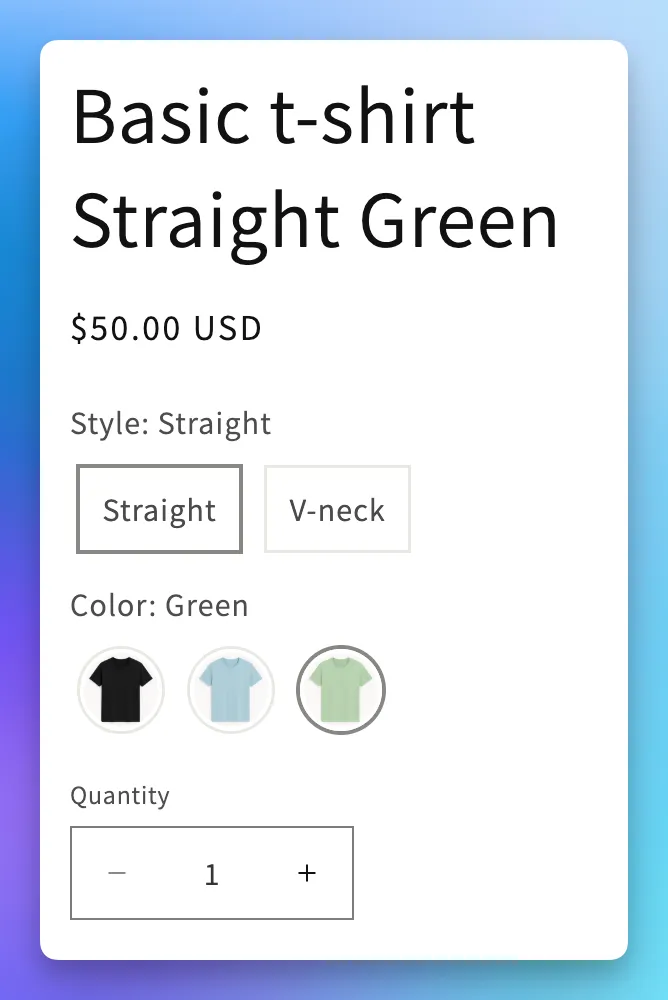
Some stores split products by both style and color - so “Basic T-Shirt in Green” and “Slim T-Shirt in Green” are all separate listings. Previously, you could group them by color, but there was no good way to also let customers switch between styles on the same page.
Now you can combine a Style group with Color groups to show both options as swatches. The Style group covers all products and uses pill swatches. Each Color group covers products of one style. On the product page, customers see both rows and can switch freely between styles and colors.
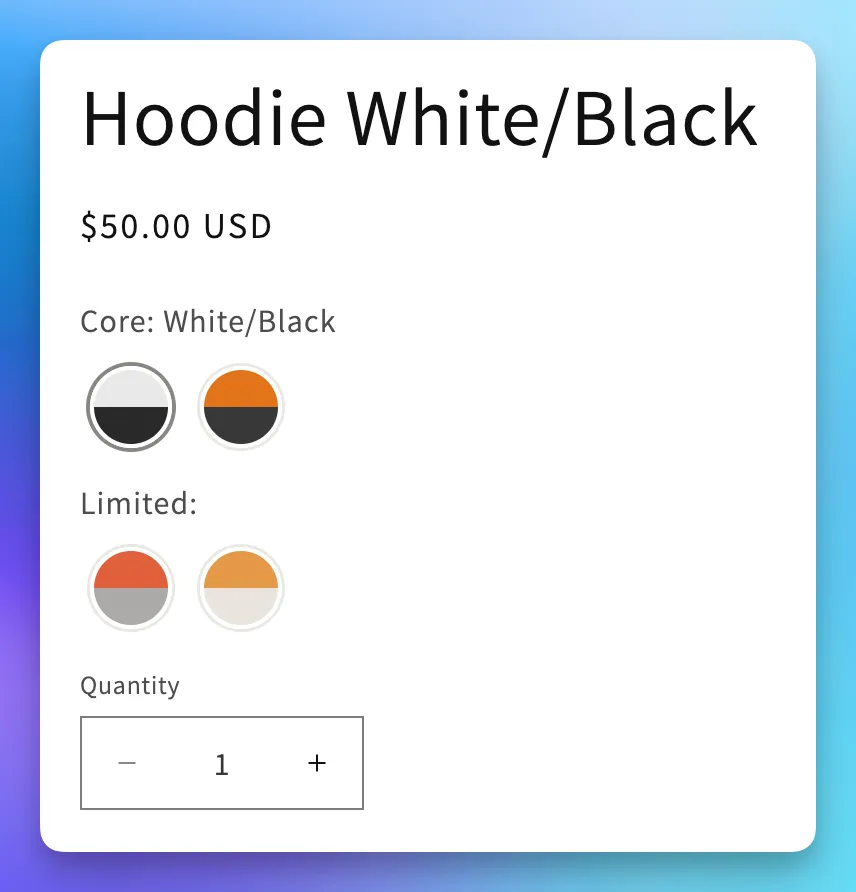
Products with many color options can end up with a long, flat swatch list. If those colors fall into natural categories - like “Core” and “Limited Edition” - a single list doesn’t reflect that structure.
You can now link groups together so they display as separate, labeled sections on the product page. Each section gets its own title and swatch row, making it easier for customers to find what they’re looking for.
Links are set up in Advanced > Linked groups on any group page. See Split swatches with sections for the full walkthrough.