
Organize variant swatches into sections
Sections split a long list of variant values into labeled groups on the product page. Instead of one flat row of swatches, shoppers see them grouped under headings like “Core colors” and “Limited edition”.
Reach for sections when a single option has a lot of values, say 20+ colors, and a flat list gets hard to scan.
Enable sections
Section titled “Enable sections”-
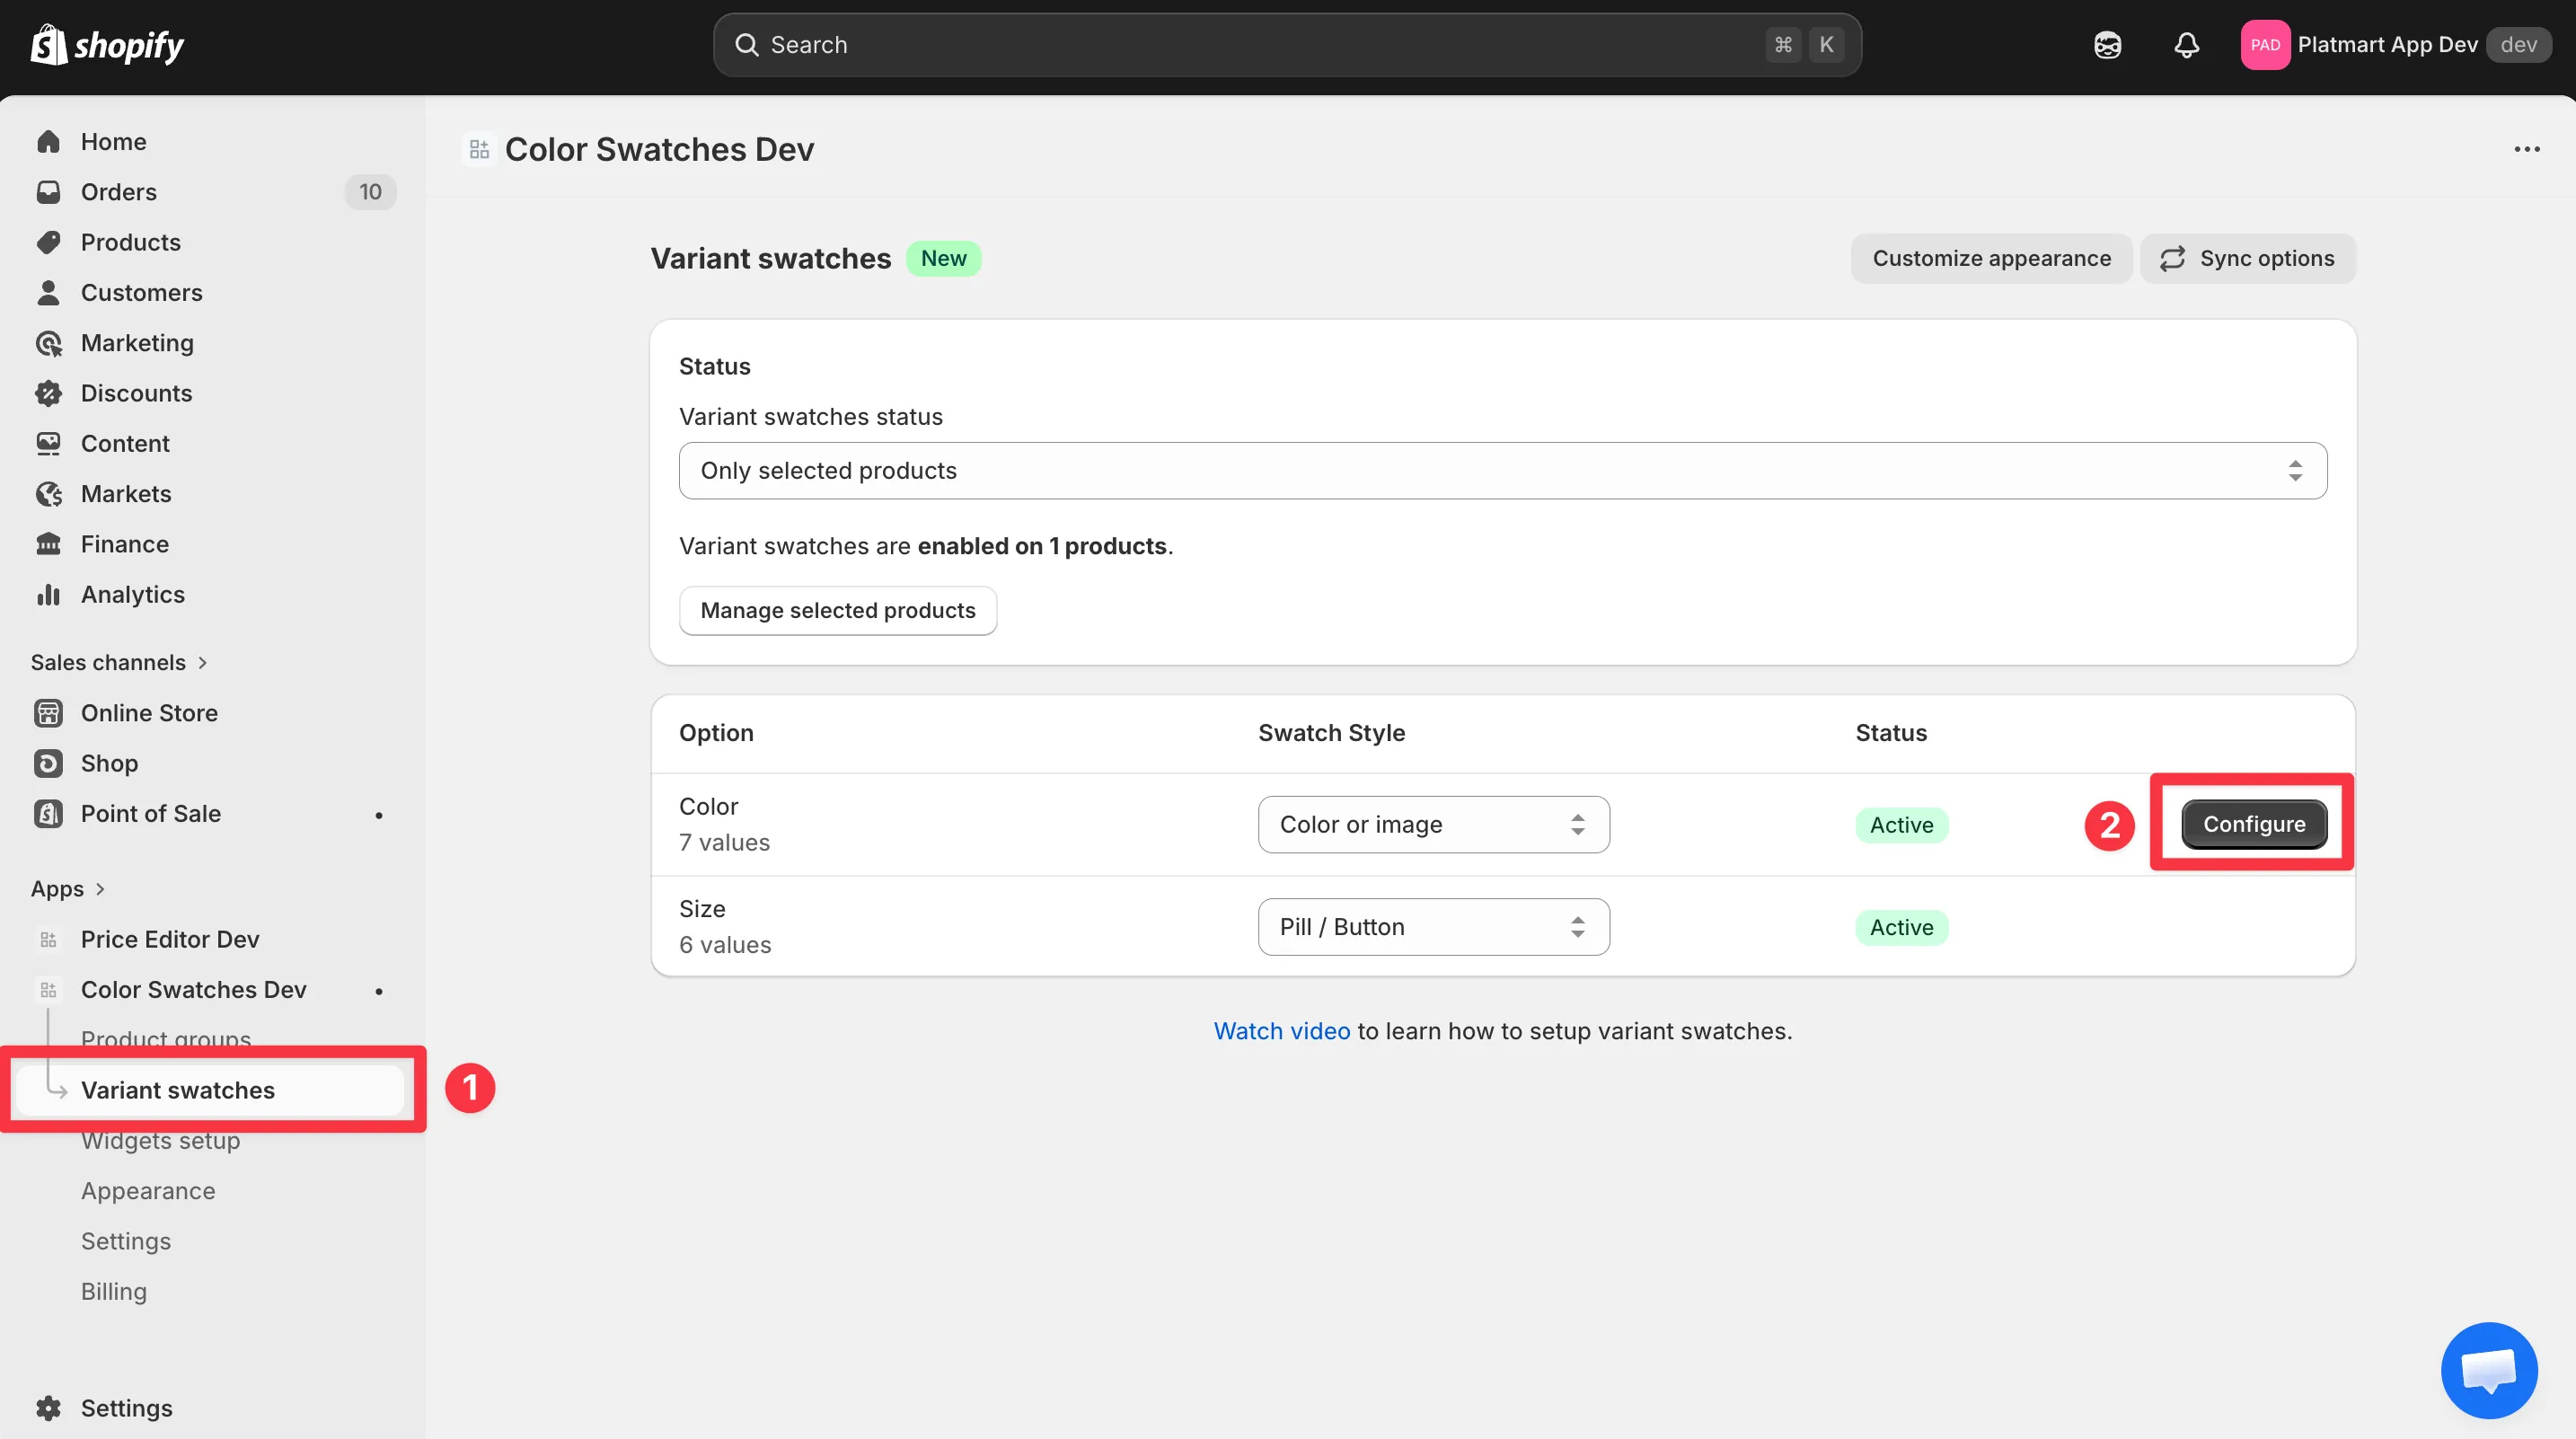
Open Color Swatches and go to Variant swatches.
-
Click Configure on the option you want to organize, like Color.
-
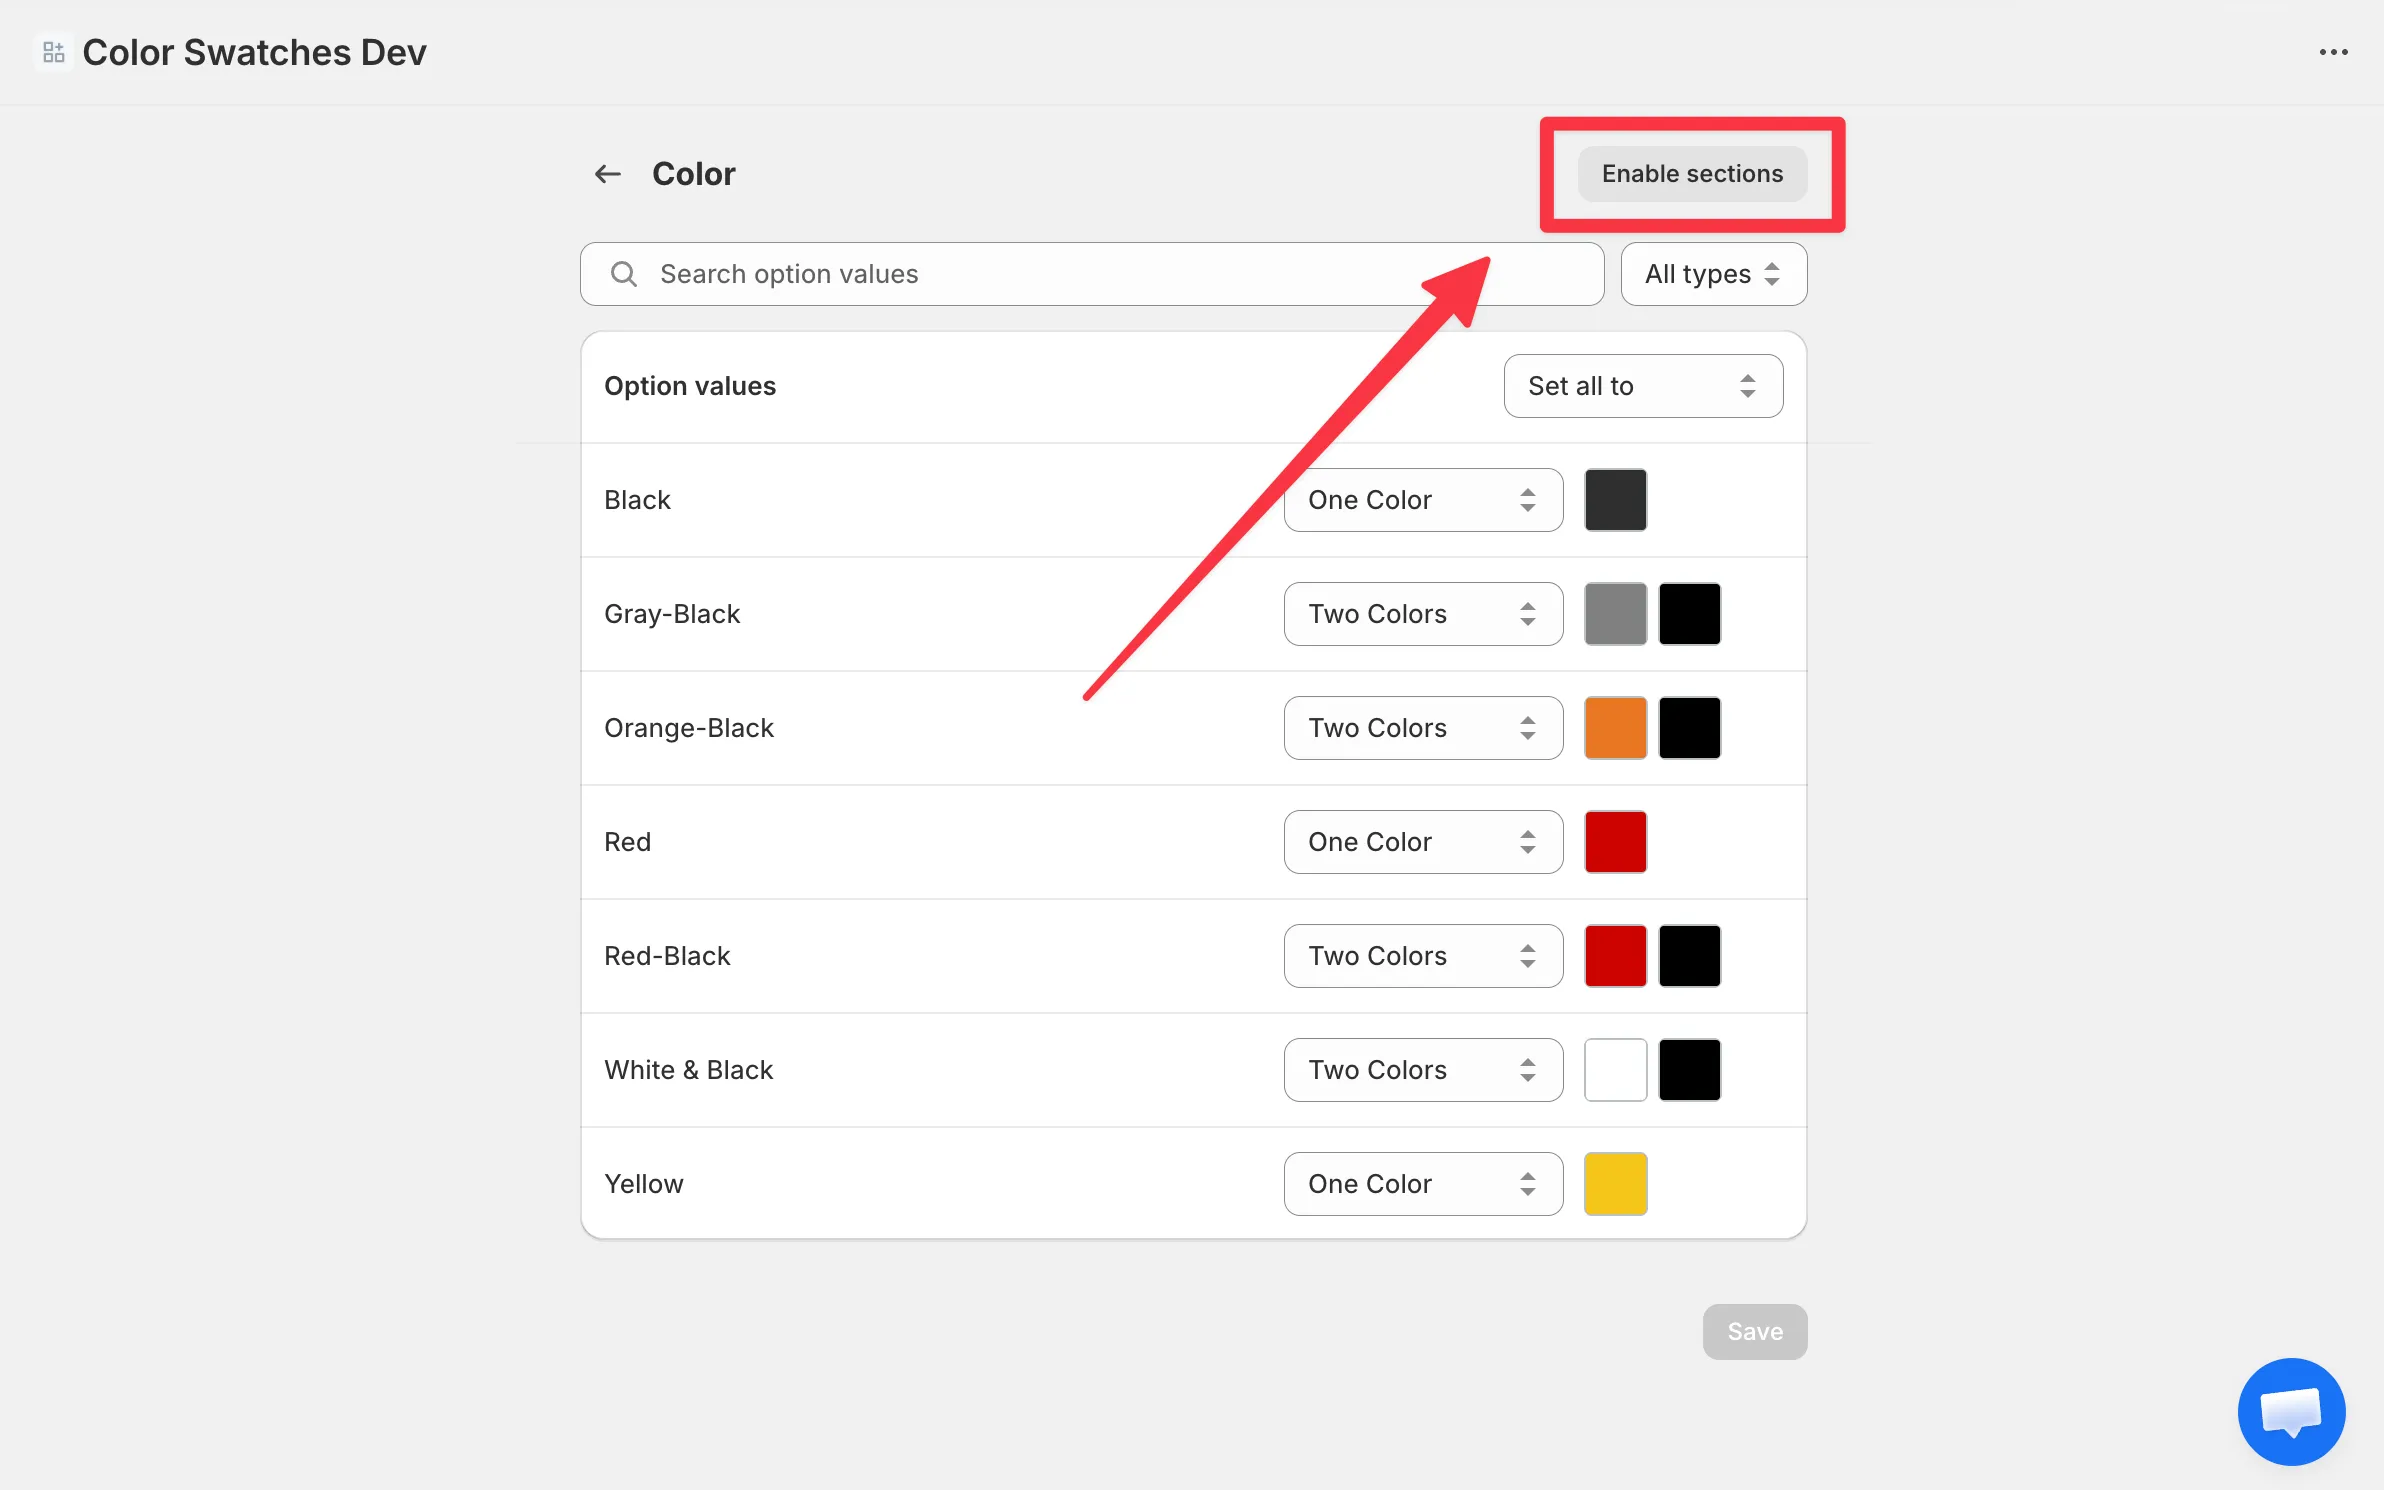
In the page actions (top right), click Enable sections.
Create your sections
Section titled “Create your sections”-
Click Manage sections in the page actions.
-
Type a section name, like
Limited edition, and click Add section.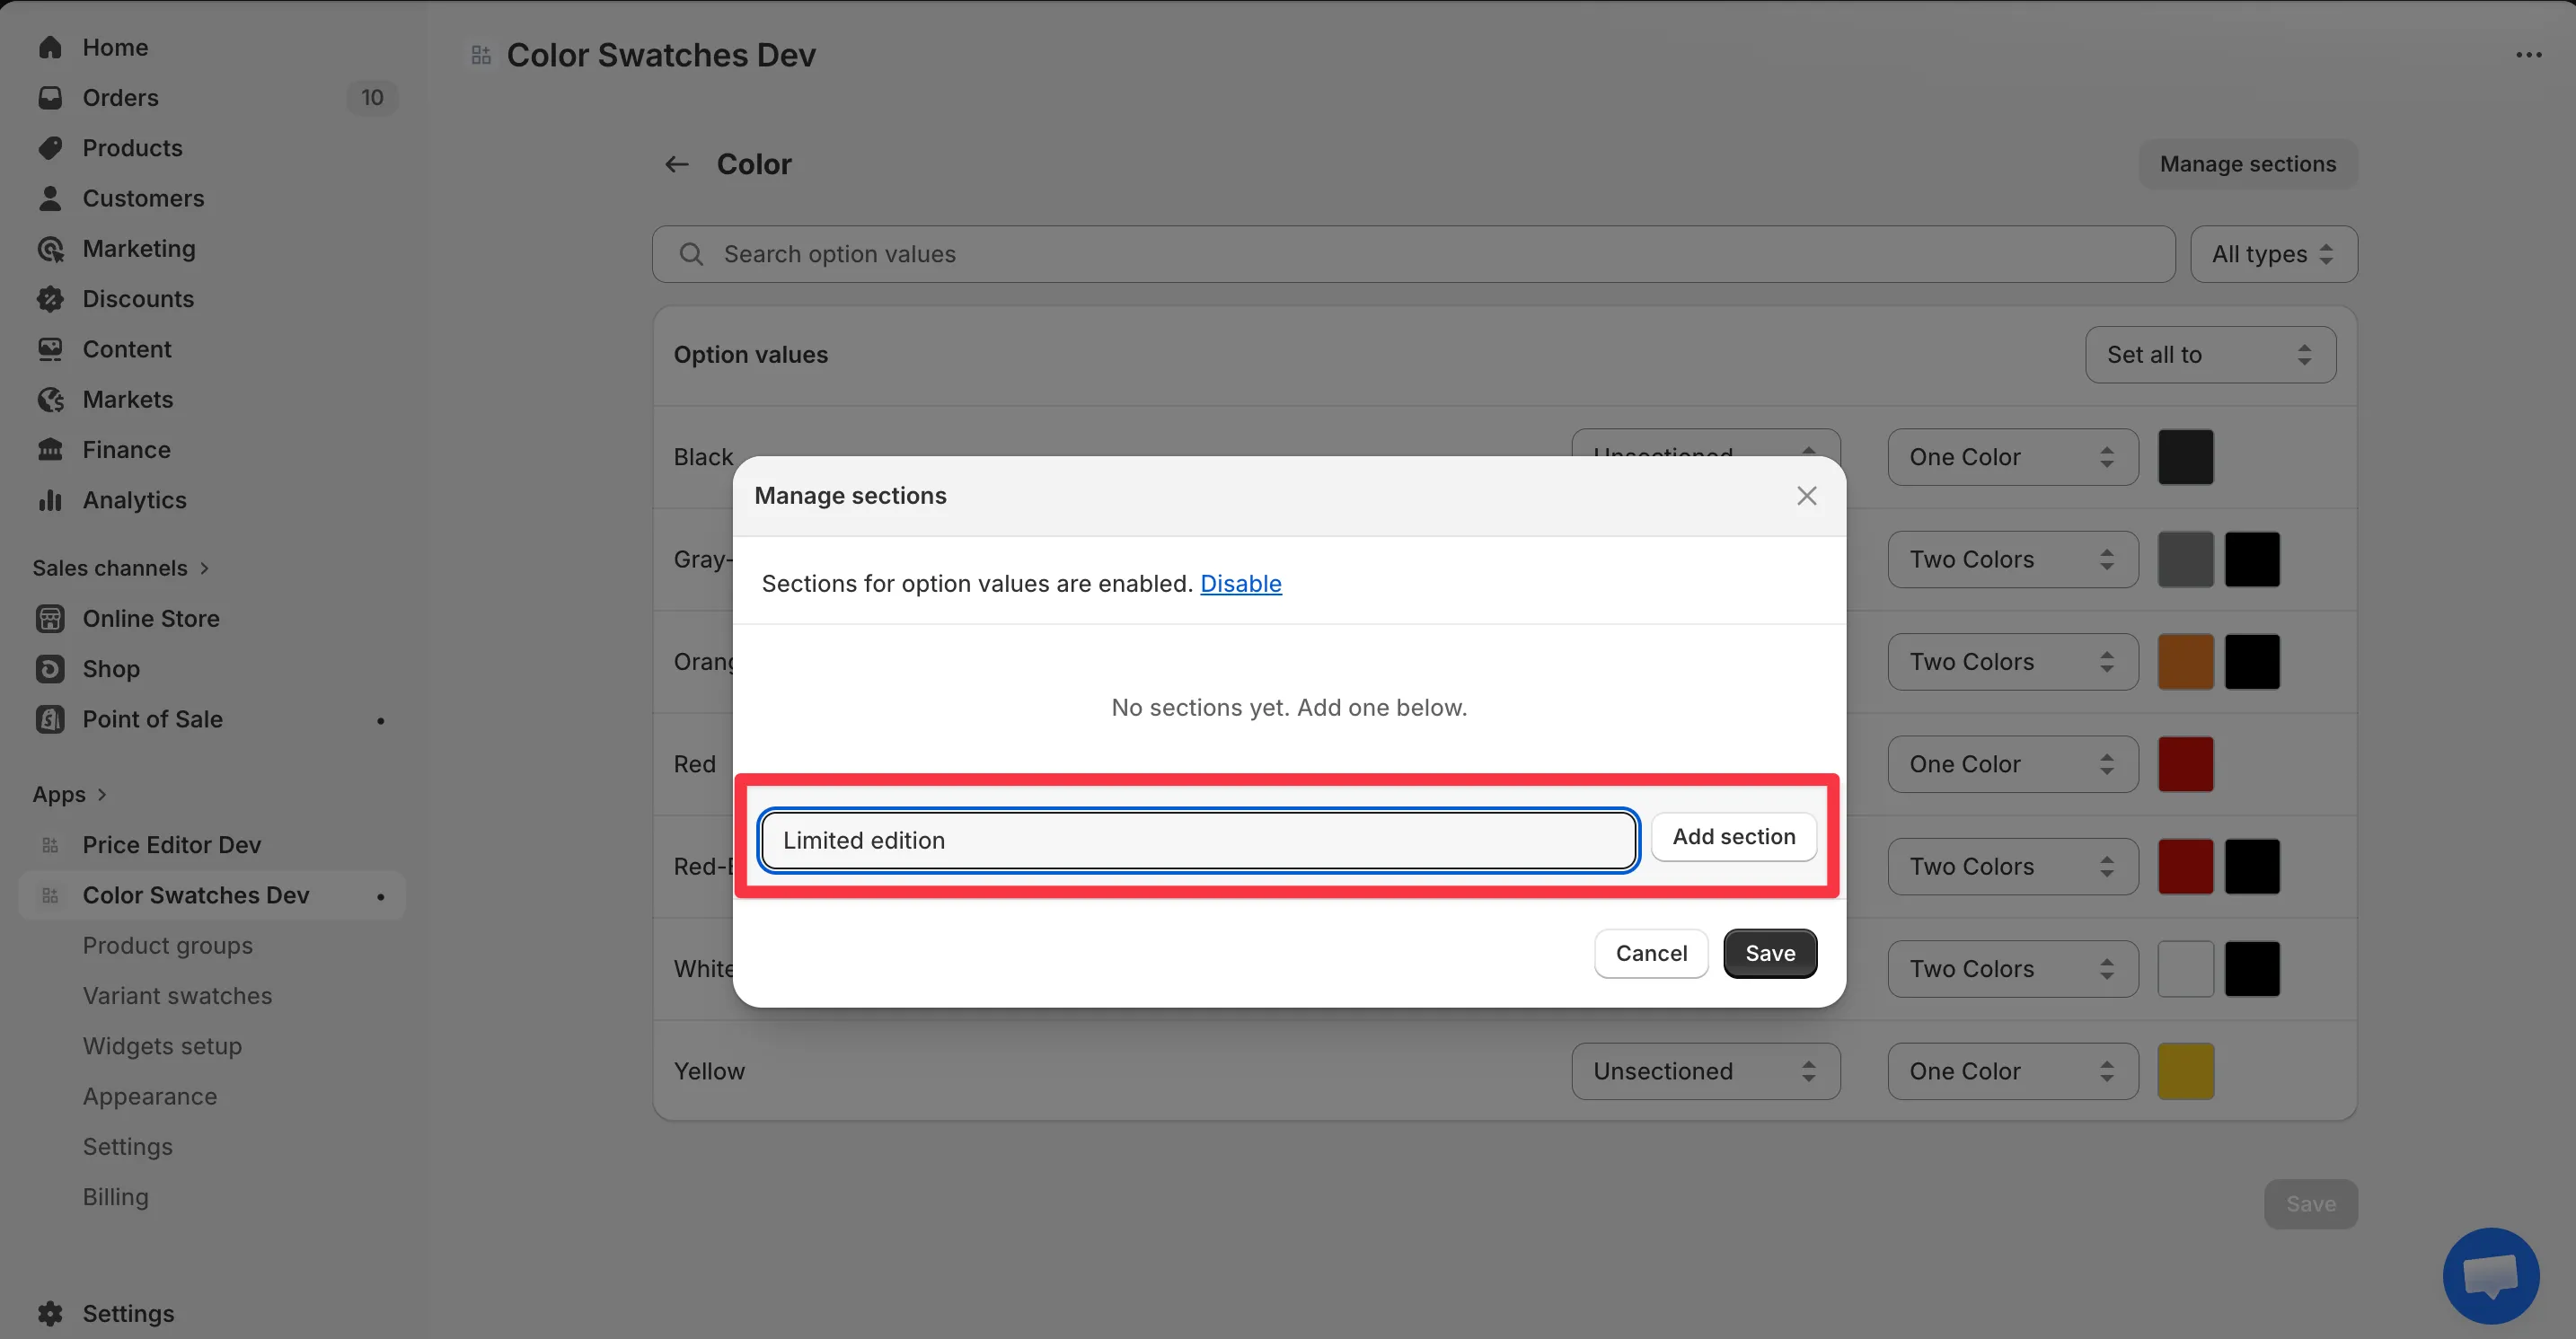
-
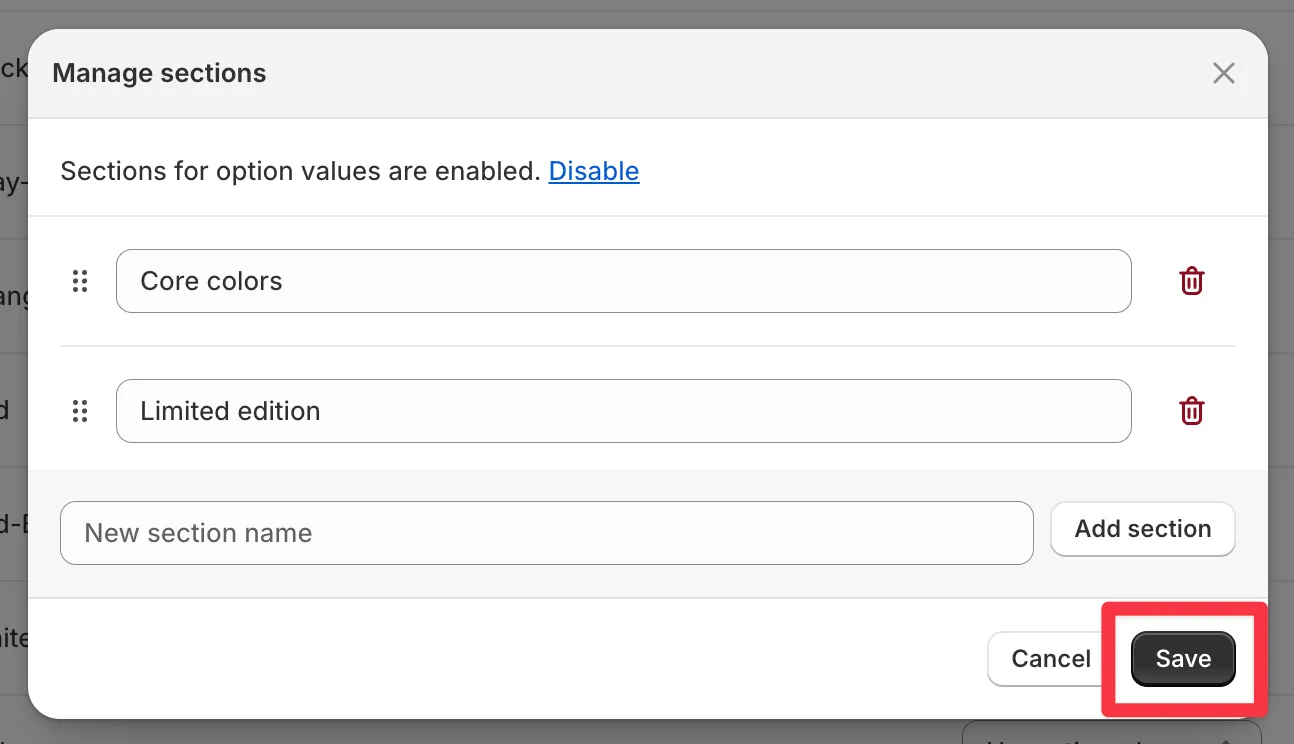
Add as many sections as you need.
-
Drag to reorder them. This sets the order they appear on the storefront.
-
Click Save.
Assign values to sections
Section titled “Assign values to sections”Each option value row now has a section dropdown. Pick a section for each value.
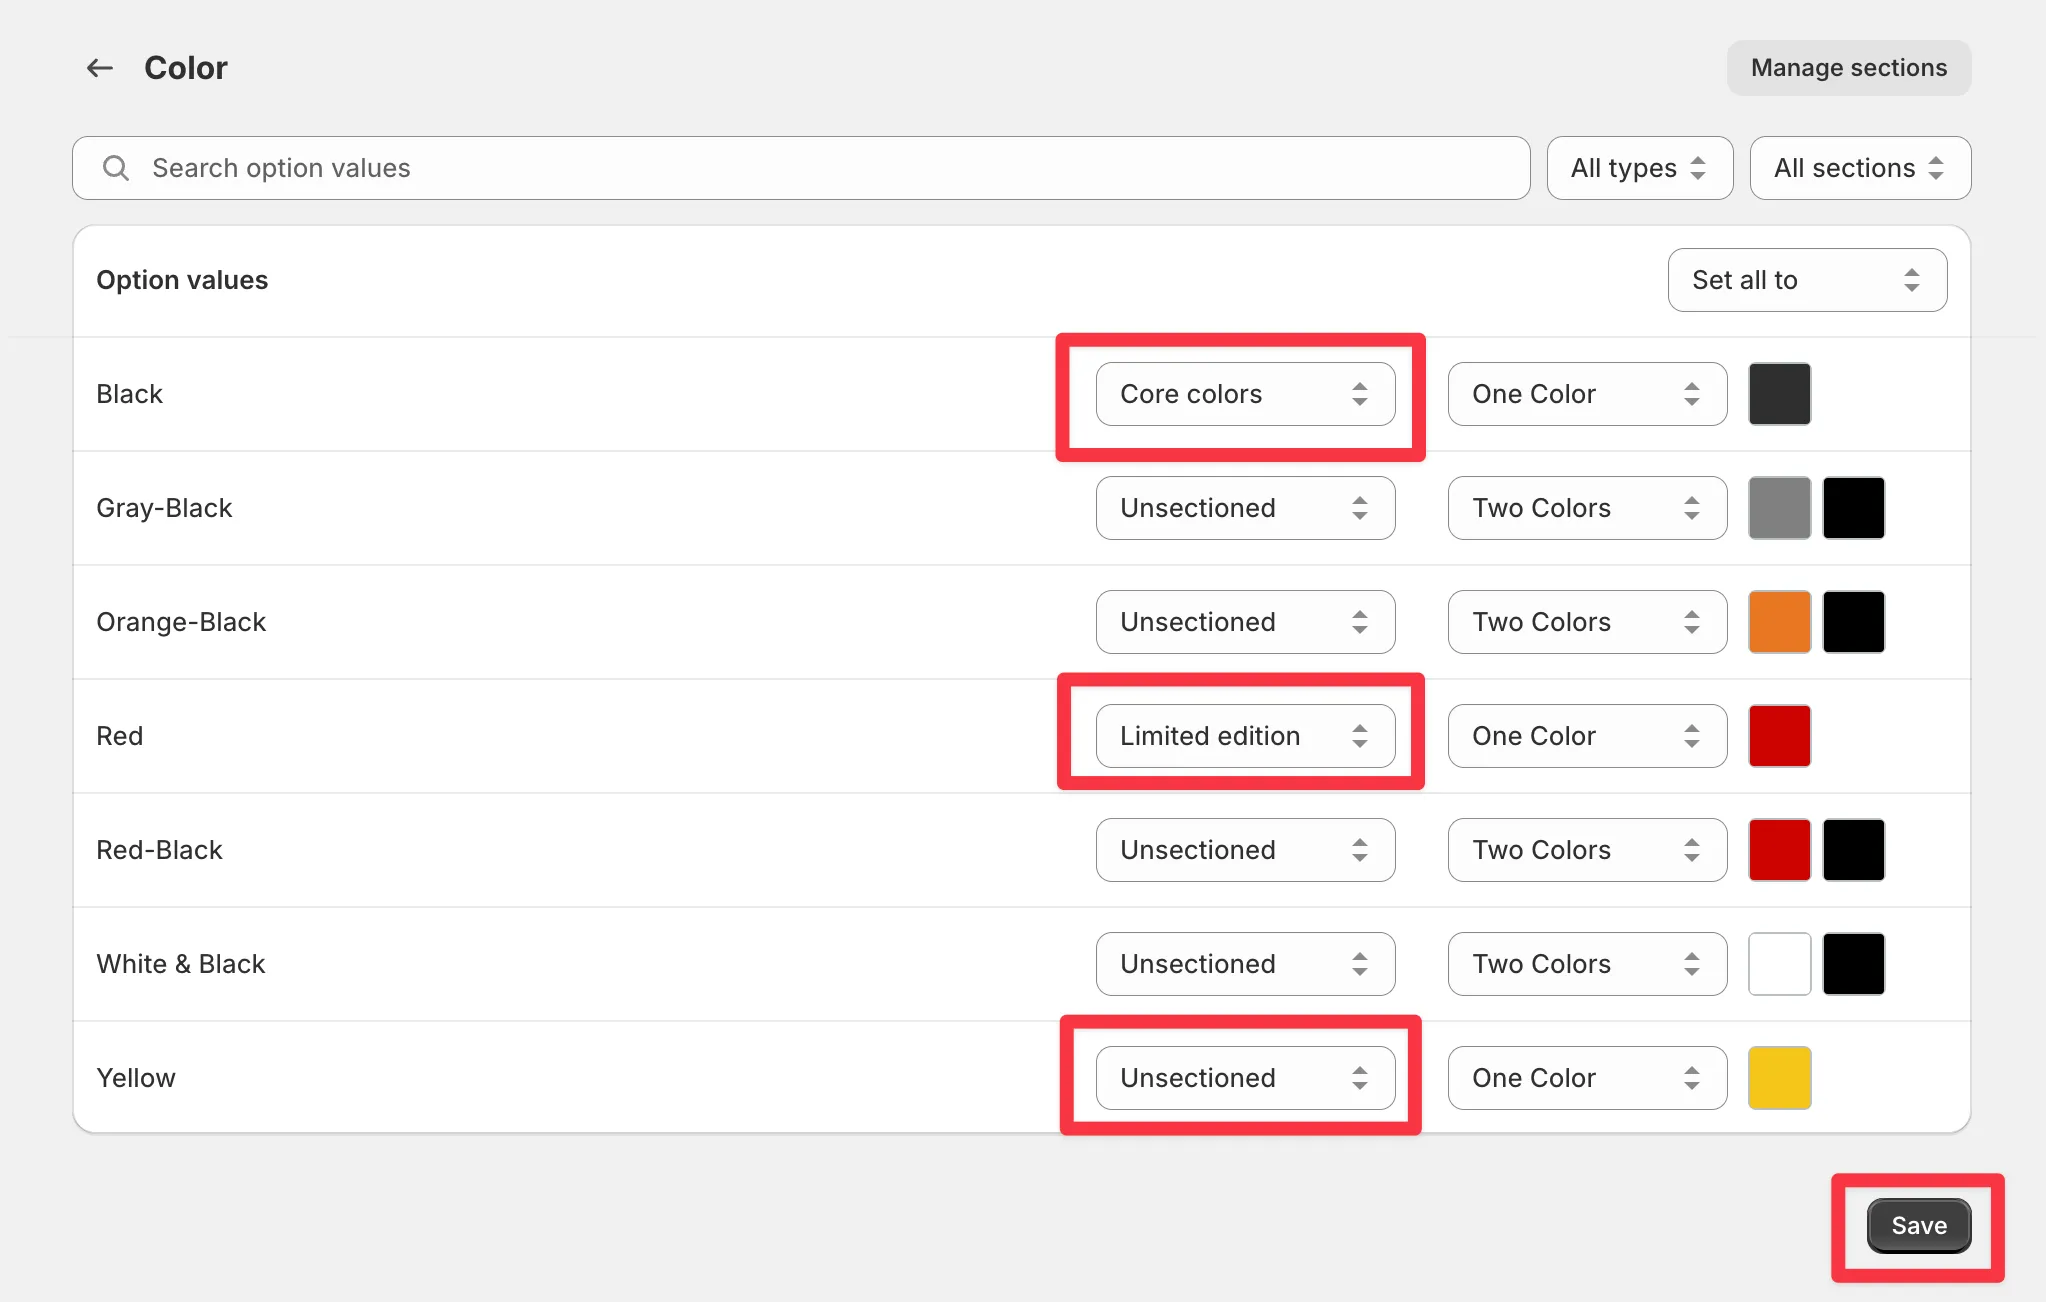
Values left as Unsectioned appear first on the product page, under the original option name. Use the All sections filter next to the search box to focus on one section at a time while you assign. Click Save when you’re done.
How it looks on the storefront
Section titled “How it looks on the storefront”Swatches render in this order:
- Unsectioned values, under the original option name (e.g. “Color”).
- Each section in the order you arranged, under its own heading.
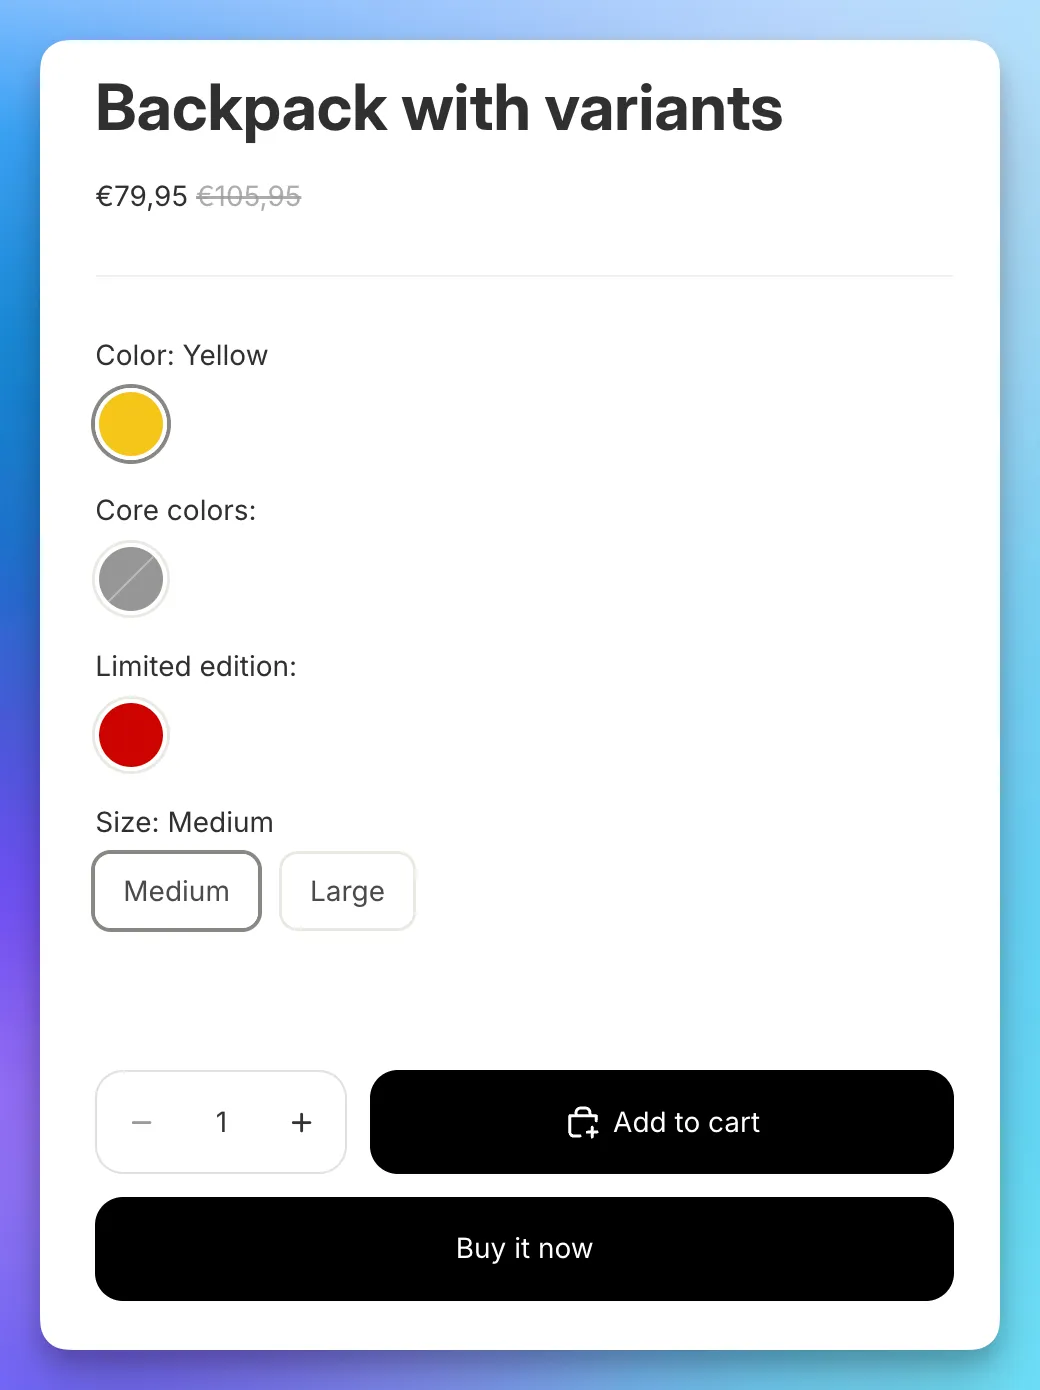
Empty sections, with no values assigned, are hidden automatically.
Turn sections off
Section titled “Turn sections off”- Click Manage sections.
- Click Disable at the top of the dialog.
- Confirm.
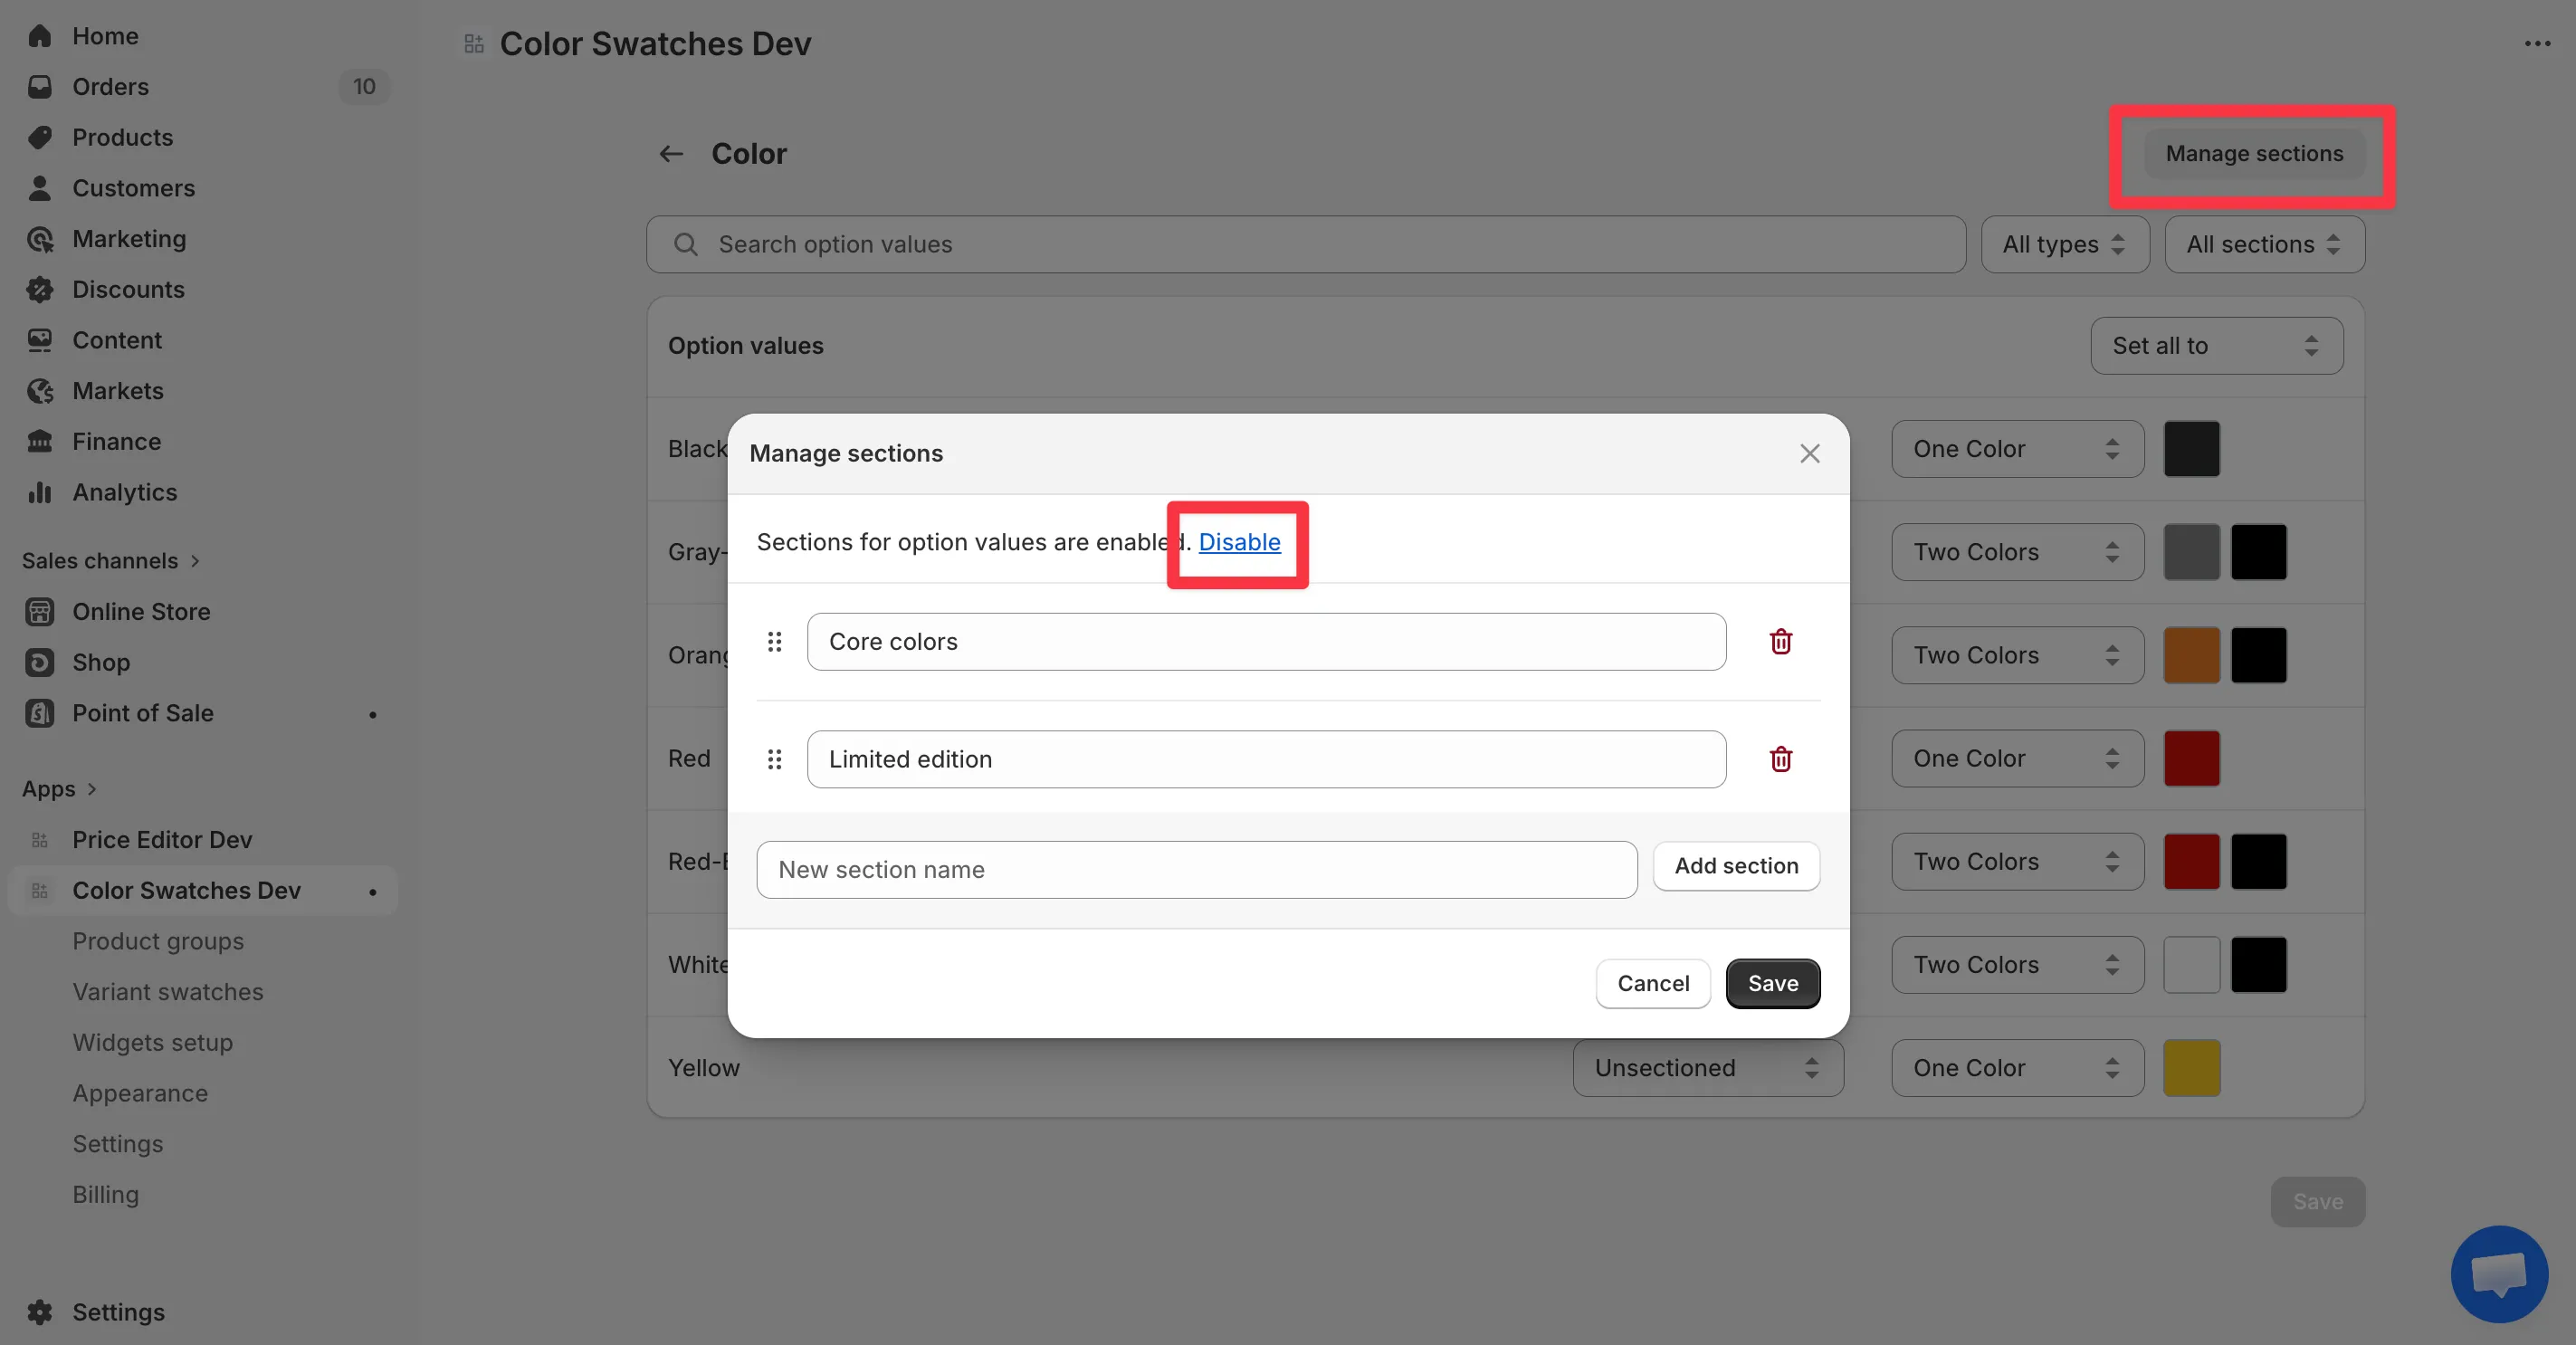
This clears the section assignments but keeps your option values and their swatches. You can re-enable sections later and start fresh.